
Create a Security Filter
Create security filters on the fly when creating a permission or ahead of time in the Security Filters room.
Overview
You can create up to 10,000 security filters in a project, except free trial tenants, which have a maximum of 100 security filters. These maximums are the default, however, contact Visier Technical Support to request limit adjustments.
Note: If the More Security Around Data Access Management feature is enabled, you will need access to all data, such as the Super Admin permission, to perform this task. For more information, see More security around data access management.
Step One: Create the security filter
To create security filters on the fly when creating a permission:
-
Click in the Population Access column.

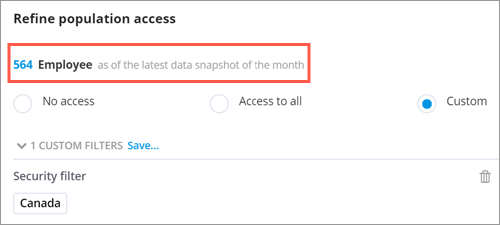
- In the Refine population access dialog, click Custom.
Tip:
You will be provided with an estimate of the population based on your setting and the custom security filters applied.
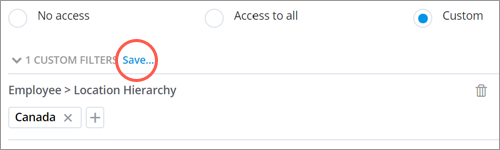
- After you add the custom security filters, you can save them and reuse in other permissions by clicking the Save button. You can manage your saved security filters in the Security Filters room.
To create security filters ahead of time in the Security Filters room:
-
In a project, on the navigation bar, click Security > Security Filters.
- Click Add Security Filter.
- In the New security filter pane, select the analytic object you want to create a security filter for and then click Next.
- Type a display name for the security filter and then click Create.
Step Two: Apply a member or dynamic filter
To give users access to a population by adding a member (static) filter:
-
In a project, on the navigation bar, click Security > Permissions.
- Create or select a permission.
- In Data Security, click the Population Access column for the analytic object.
- Click Member Filter.
- In the Filter dialog, include or exclude the attribute values that define the population you want to grant access to.
- Click Apply.
To give users access to a population by adding a dynamic filter:
-
In a project, on the navigation bar, click Security > Permissions.
- Create or select a permission.
- In Data Security, click the Population Access column for the analytic object.
- Click Dynamic Filter.
-
Do one of the following:
Option Do this Map a user attribute to a dimension - Click User to dimension. For more information, see Mapping a user to a dimension.
- In the Filter dialog, select the attribute you want to base your filter on.
Note: For dynamic filters to work, you must select a hierarchy that is based on Employee IDs, typically there are only two that can be used: the Supervisory Hierarchy or an Organization Hierarchy where there is an Org Head defined for each Org unit. After selecting the desired hierarchy, select the User property that will be used as the matching value, typically this is EmployeeID.
- In the Map user properties dialog, select the user property that you want to link the name property or organization head to.
- Click Apply.
Map a user's Employee ID to individual subject members -
Click User to data file. For more information, see Security Filters.
Note:
- For this to work, you must provide a mapping file to the Visier Technical Support team. Population access is determined by the file and the mappings between a user's Employee ID to individual employees, requisitions, candidates, etc.
- A separate mapping file is required for each subject.