
Register a Client Application
Register a client application so you can authorize access to your Visier account using OAuth 2.0.
Access requirements
Profiles: OAuth 2.0 Client Administrator
Custom profile with these capabilities: OAuth 2.0 Client Registration
Reach out to your administrator for access.
Overview
OAuth 2.0 is an authorization standard that, when set up in Visier, allows you to access your Visier credentials in other applications. For more information, see OAuth 2.0. Each user who wants to authorize their Visier credentials in other applications must create an OAuth client in Visier for that application. This article describes how users can register OAuth 2.0 clients in Visier to enable three-legged authorization.
OAuth 2.0 relies on a combination of a client ID and redirect URIs to securely authorize Visier user credentials in other applications, as described next.
- Client ID: A Visier-generated unique identifier for the registered OAuth 2.0 client.
- Redirect URIs: A list of URLs through which to send single-use authorization codes from Visier's server back to the other application. Redirect URIs are typically a URL associated with the client application.
- Client secret: A Visier-generated secret to protect the registered OAuth 2.0 client. This is only shown once.
Create a client registration
To set up OAuth 2.0 for your Visier tenant, you must first create a client registration in Studio. This registers your OAuth 2.0 client with Visier's authorization server. Client registration is required before you can use OAuth 2.0 to get your Visier data in other applications. The OAuth 2.0 client allows other applications to obtain a token representing your Visier user that authorizes the other application to take action on your behalf, such as querying Visier's platform.
Client applications should be registered at the administrating tenant level. To make OAuth calls for analytic tenants, use the client ID and client secret from the administrating tenant client registration with analytic tenant’s user credentials.
Each Visier tenant may contain a maximum of 100 client registrations.
- On the global navigation bar, click Settings > OAuth 2.0.
- Click Create Client Registration.
- In Client name, type a display name for the client registration.
- In Redirect URIs, type the URLs through which Visier can send authorization codes to the client application. Redirect URIs are typically a URL associated with the client application.
Note: Each client registration may contain a maximum of 50 redirect URIs.
- In Refresh token duration, type the number of hours that the refresh token is valid. The minimum is 1 hour and the maximum is 720 hours (30 days).
- When finished, click Create.
Result: Visier assigns a client ID and client secret to the client registration, as shown in the following screenshot.
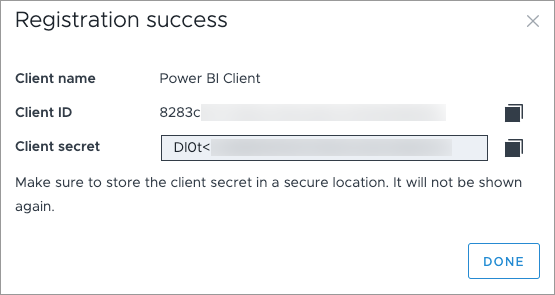
- Beside the Client ID, click the Copy button
 . You need the client ID to authorize your Visier credentials in other applications.
 -
Beside Client secret, click the Copy button
. You need the client secret to authorize your Visier credentials in other applications.Warning: Store the client secret in a secure location. The client secret is not accessible after you close the Registration success dialog.
- When finished, click Done.
Result: You can now access your Visier credentials in other applications.