
Set Up SCIM for Microsoft Entra ID
Use Microsoft Entra ID to synchronize the creation, deletion, and updating of users and user groups in Visier.
Overview
SCIM, the System for Cross-Domain Identity Management, automates the exchange of identity information between two entities, such as your identity provider (IdP) and Visier. SCIM replaces manual user management and user group management in Visier. By setting up SCIM with Visier, you can reduce the effort it takes to create, modify, and synchronize employee accounts between your IdP and users and user groups in Visier.
This topic describes how to set up SCIM if your identity provider is Microsoft Entra ID. For more information about setting up SCIM with Microsoft Entra ID, see SCIM synchronization with Microsoft Entra ID.
Microsoft Entra ID SCIM in Visier synchronizes users from Microsoft Entra ID to Visier. If you delete a user in Microsoft Entra ID, SCIM deletes that user in Visier. If you delete a user in Visier, nothing happens to the user in your Microsoft Entra ID. If you have existing user groups in Visier before setting up SCIM, you cannot import the groups to Microsoft Entra ID or associate Microsoft Entra ID Groups to Visier user groups. Instead, recreate the groups in Microsoft Entra ID to replace the existing Visier user groups.
Tip: For more information about general SCIM issues, see Troubleshooting.
Step One: Configure SCIM in Visier
Prerequisites: Create a service account user in Visier and assign the Visier Analytics User and Visier Cloud Administrator profiles. This user executes all SCIM requests in Visier.
On the global navigation bar, click Settings > SCIM Configuration. In Configuration type, select one of:
-
SCIM API token: Generates a long-lived token that authenticates SCIM API requests from the service account. You can think of the API token as a physical key that provides access to your SCIM API. Protect your API token to protect your SCIM implementation.
Caution: Long-lived tokens are valid for one year. Before the token expires, please issue a new token. To start using the new token, switch your IdP to the new token, validate that SCIM continues to work, and then remove the old token.
- Direct trust SCIM: Accepts a public RSA key from your identity provider. Direct trust SCIM uses asymmetric cryptography (public/private keys) and is more secure because the IdP signs a short-lived token (JWT) with its private key. Visier then verifies the JWT with the public key. The private key is never transmitted. You can think of direct trust SCIM as a bank verifying your signature instead of you handing over a key.
The following table differentiates between the two SCIM methods.
|
SCIM API token |
Direct trust SCIM |
|---|---|
|
Static secret security |
Asymmetric cryptography security |
|
Simple set up |
More complex set up |
|
Best for quick setup when your IdP supports Bearer Token authentication |
Best for security-conscious organizations |
|
Use if your infrastructure cannot issue a self-signed JWT |
Use if your infrastructure can issue a self-signed JWT to attach in all outgoing SCIM API calls |
In most cases, we recommend the SCIM API token. If you're familiar with the more advanced direct trust SCIM method, you can use it instead.
SCIM API token
- Click Generate SCIM Token.
- In Display name, type the token's name.
- In User, select the service account user you created as part of the SCIM prerequisites.
- Click Generate Token.
- Click Copy to copy the SCIM token to your clipboard.
Warning: This token is only displayed once. Copy it and store it in a secure location. You will not be able to retrieve it again.
Direct trust SCIM
- Click Configure Direct Trust SCIM.
- In the Public RSA Key box, paste the public key associated with your IdP JSON Web Token (JWT). The public key must be an RSA public key in PEM encoding as specified in RFC 7468 and supports the formats X.509 certificate, PKCS#1 RSAPublicKey, and X.509 SubjectPublicKeyInfo.
Example:
Copy-----BEGIN PUBLIC KEY-----
MIICIjANBgkqhkiG9w0BAQEFAAOCAg8AMIICCgKCAgEAoAF1T6ZubDUlCK1EJ1XX
…
-----END PUBLIC KEY----- - In the Issuer box, type the entity ID of the IdP. The issuer uniquely identifies the identity provider within the solution and must match the iss claim in the OAuth 2.0 bearer token provided by the IdP.
- In the Subject box, type the subject ID of the JWT. The subject is a unique identifier that must match the sub claim in the OAuth 2.0 bearer token provided by the IdP.
- In SCIM service account, select the user you created as part of the SCIM prerequisites.
- Click Save.
(Optional) Network subnets
To add a layer of security, you can specify a list of IP addresses that are allowed to make SCIM requests. To set the network subnets:
- In Network subnets, type the IP addresses using the Classless Inter-Domain Routing (CIDR) format: xxx.xxx.xxx.xxx/xx.
- When finished, click Save.
Step Two: Configure SCIM in Microsoft Entra ID
To set up SCIM in Microsoft Entra ID, create a new configuration in the enterprise application.
- Sign in to Microsoft Entra admin center.
- Navigate to Identity > Applications > Enterprise applications.
- In the list of applications, select the application in which you want to set up SCIM with Visier.
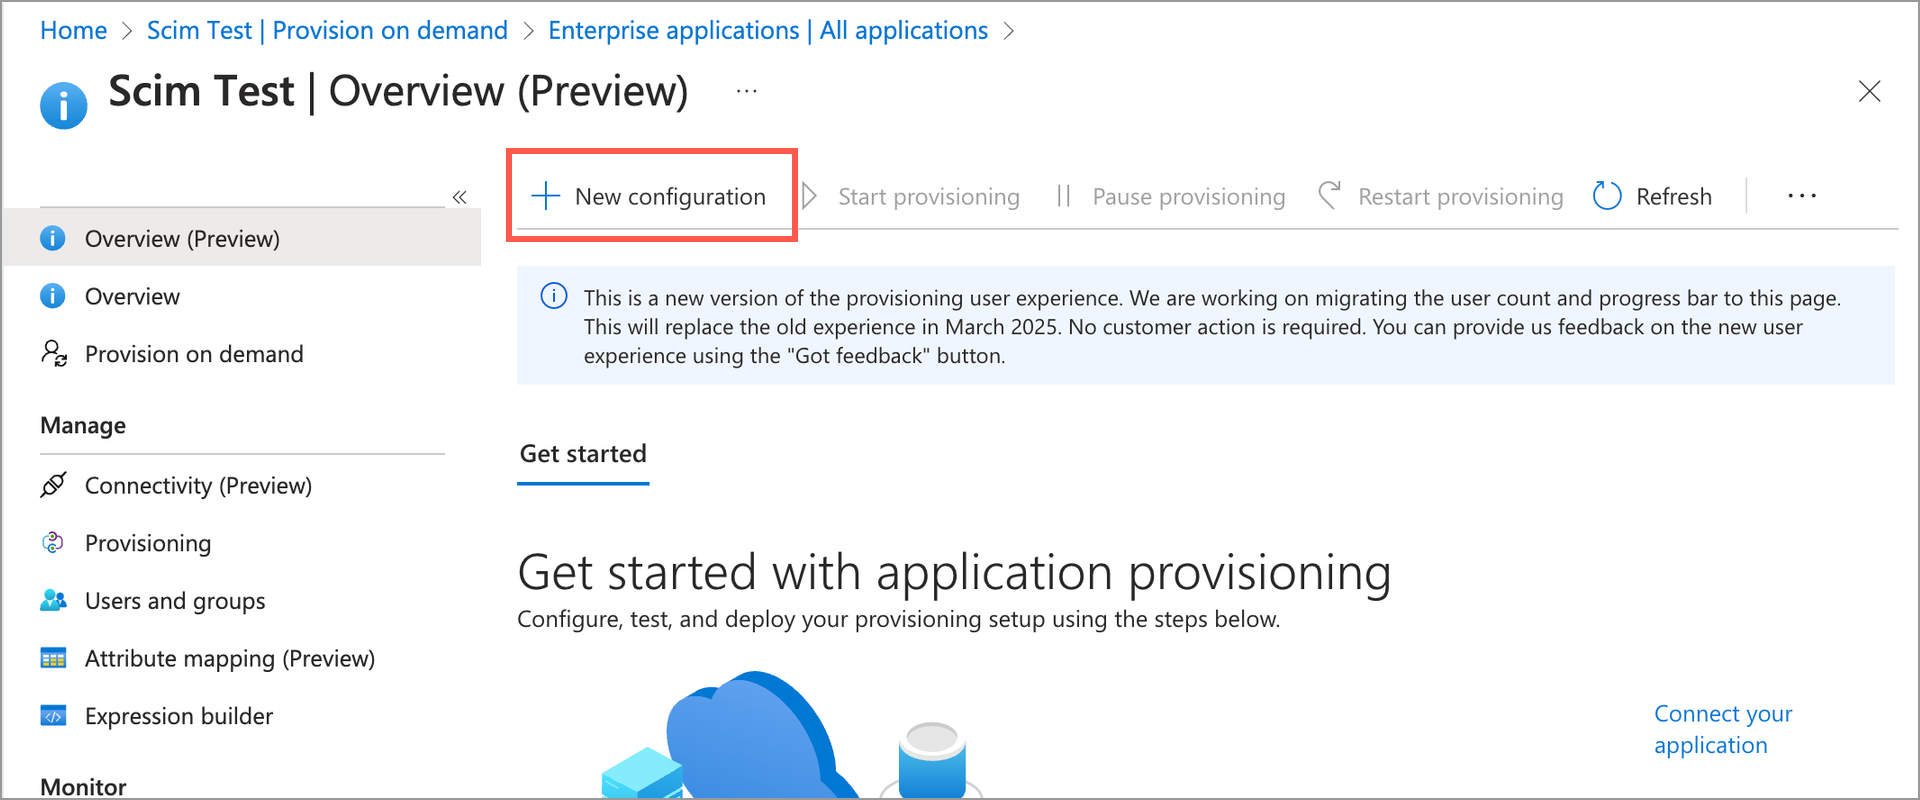
- In the application's Overview, click New configuration, as shown in the following screenshot.
- In Tenant URL, type https://{vanity_name}.visier.com/hr/scim/v2, where {vanity-name} is your Visier vanity name.
Tip:
To find your vanity name:
- Go to the global workspace in Studio, click Settings > Single Sign-On. Then, under Single Sign-On, find your service provider endpoint; for example, https://jupiter.visier.com/VServer/auth. In this example, jupiter is the vanity name.
- As an administrating tenant, go to the global workspace in Studio, click Settings > Partner Single Sign-On. Then under Bypass Users (Optional), find your service provider endpoint; for example, https://jupiter.visier.com/VServer/auth. In this example, jupiter is the vanity name.
- In Secret token, paste the private key associated with your IdP JSON Web Token (JWT).
- Click Test Connection. This checks that Microsoft Entra ID can connect to Visier.
- When successful, click Create.
After creating the communication configuration between Microsoft Entra ID and Visier, set your attribute mappings.
- On the navigation bar, click Attribute mapping, as shown in the following screenshot.
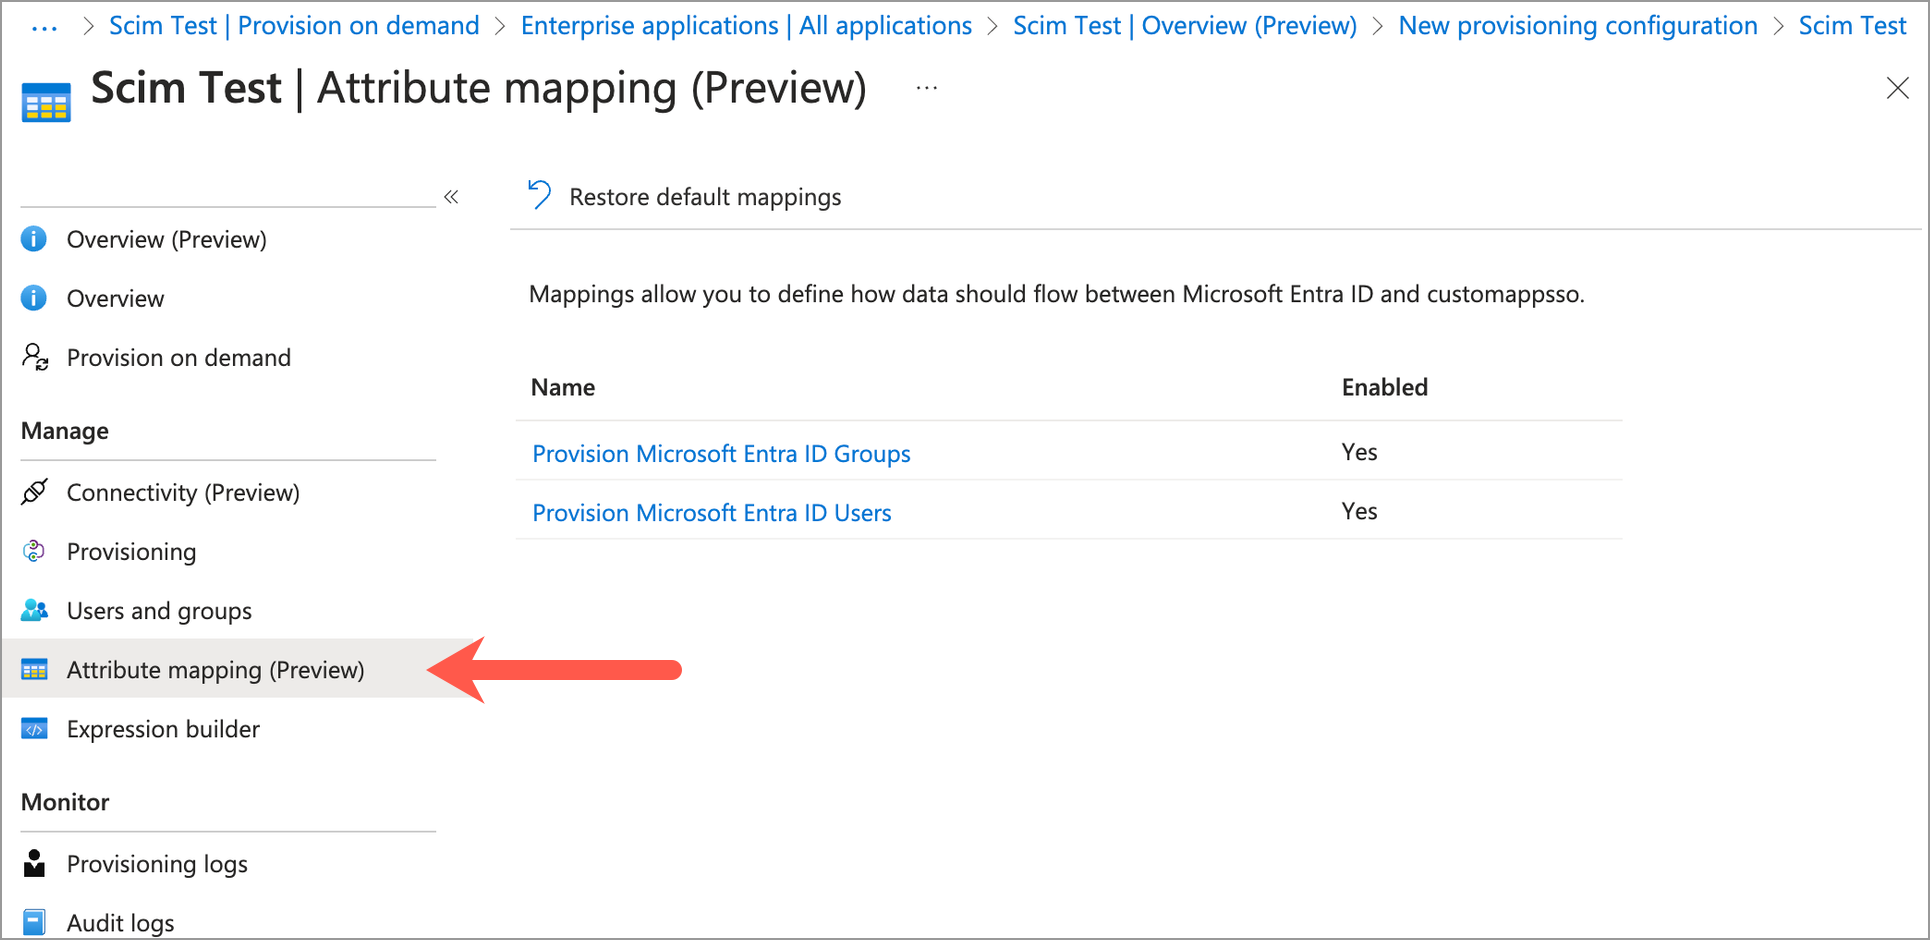
- In the list of mappings, click Provision Microsoft Entra ID Users.
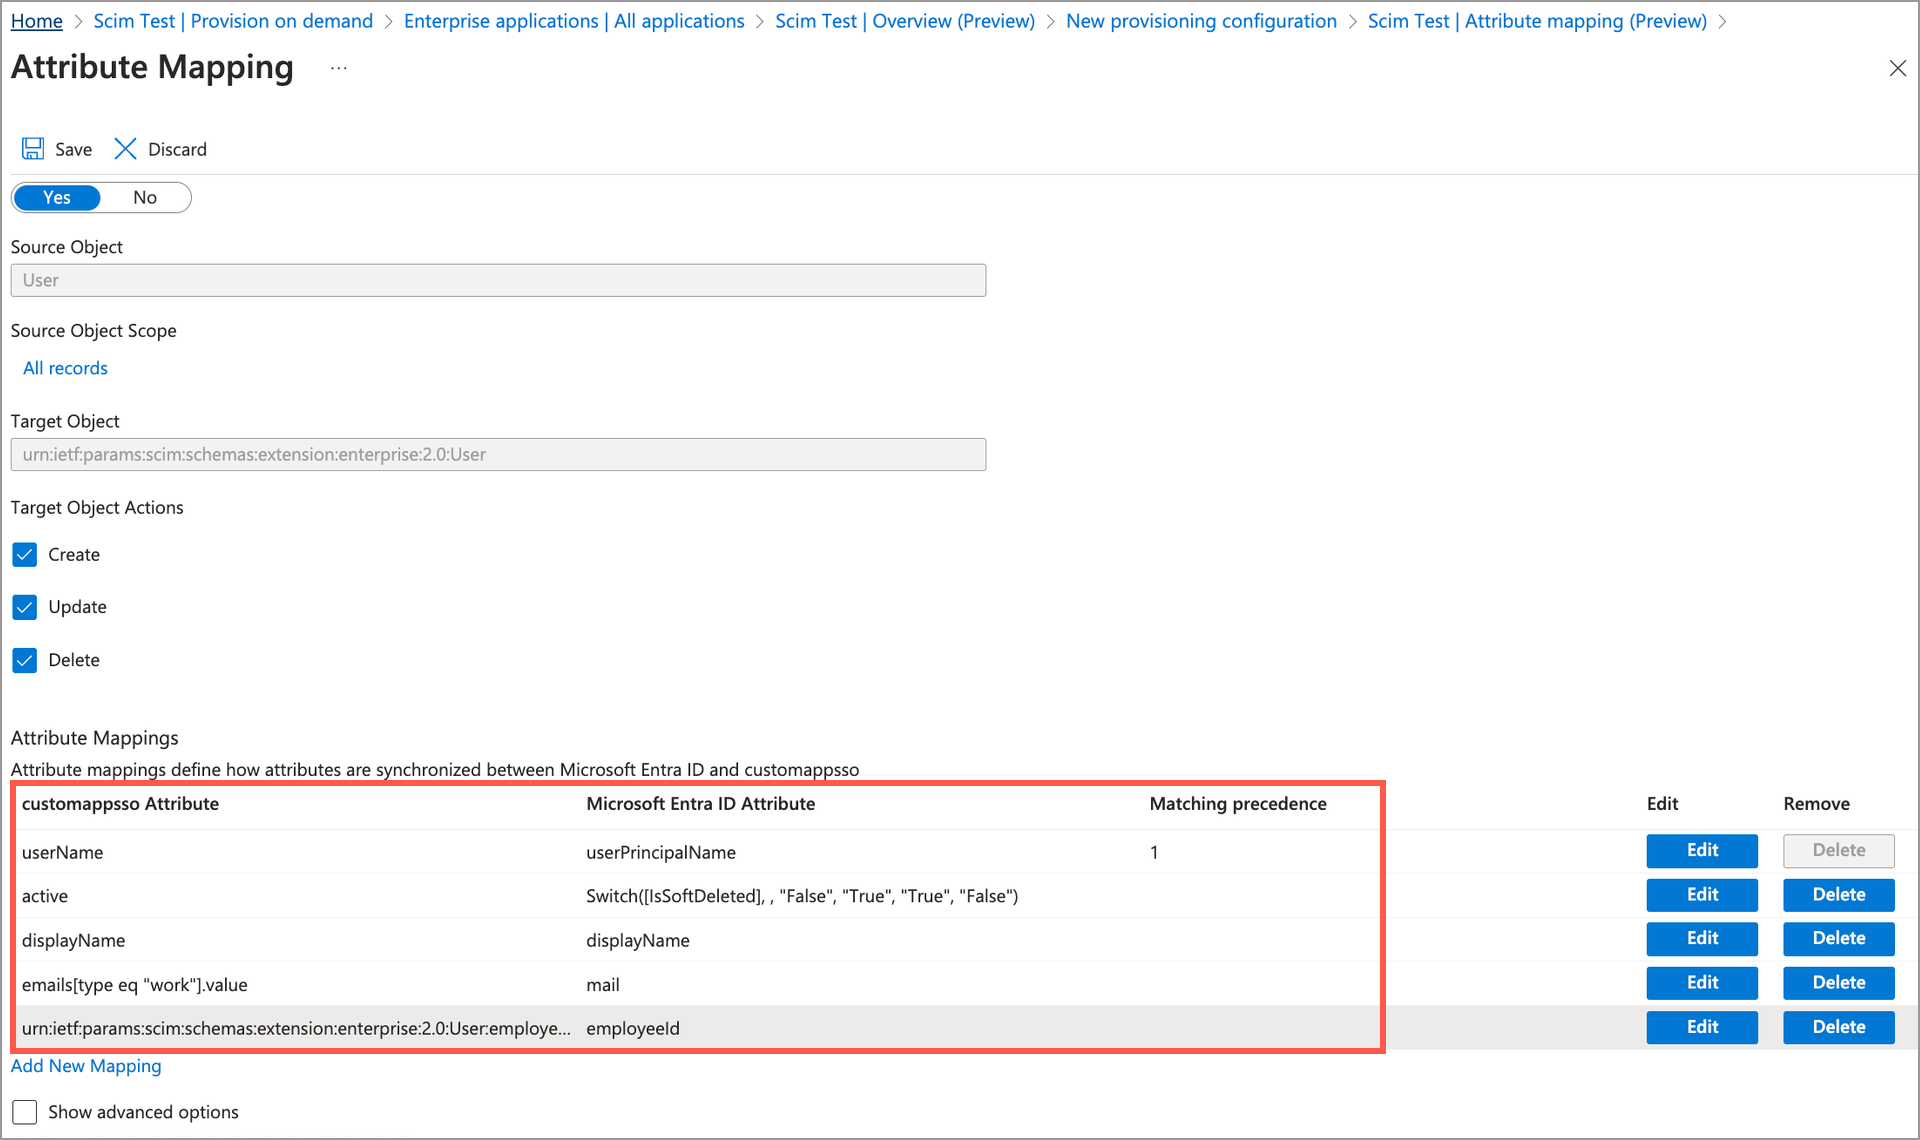
- In Target Object Actions, select the actions to execute in Visier from the list of Create, Update, and Delete. For example, if you don't want to delete users in Visier when a user is deleted in Microsoft Entra ID, do not select Delete.
-
In Attribute Mappings, delete every custommapsso Attribute mapping except the following:
- userName
- active
- displayName
- emails[type eq "work"].value
- urn:ietf:params:scim:schemas:extension:enterprise:2.0:User:employeeNumber
When finished, your attribute mappings list should only contain the above mappings, as shown in the following screenshot.
- When finished, click Save.
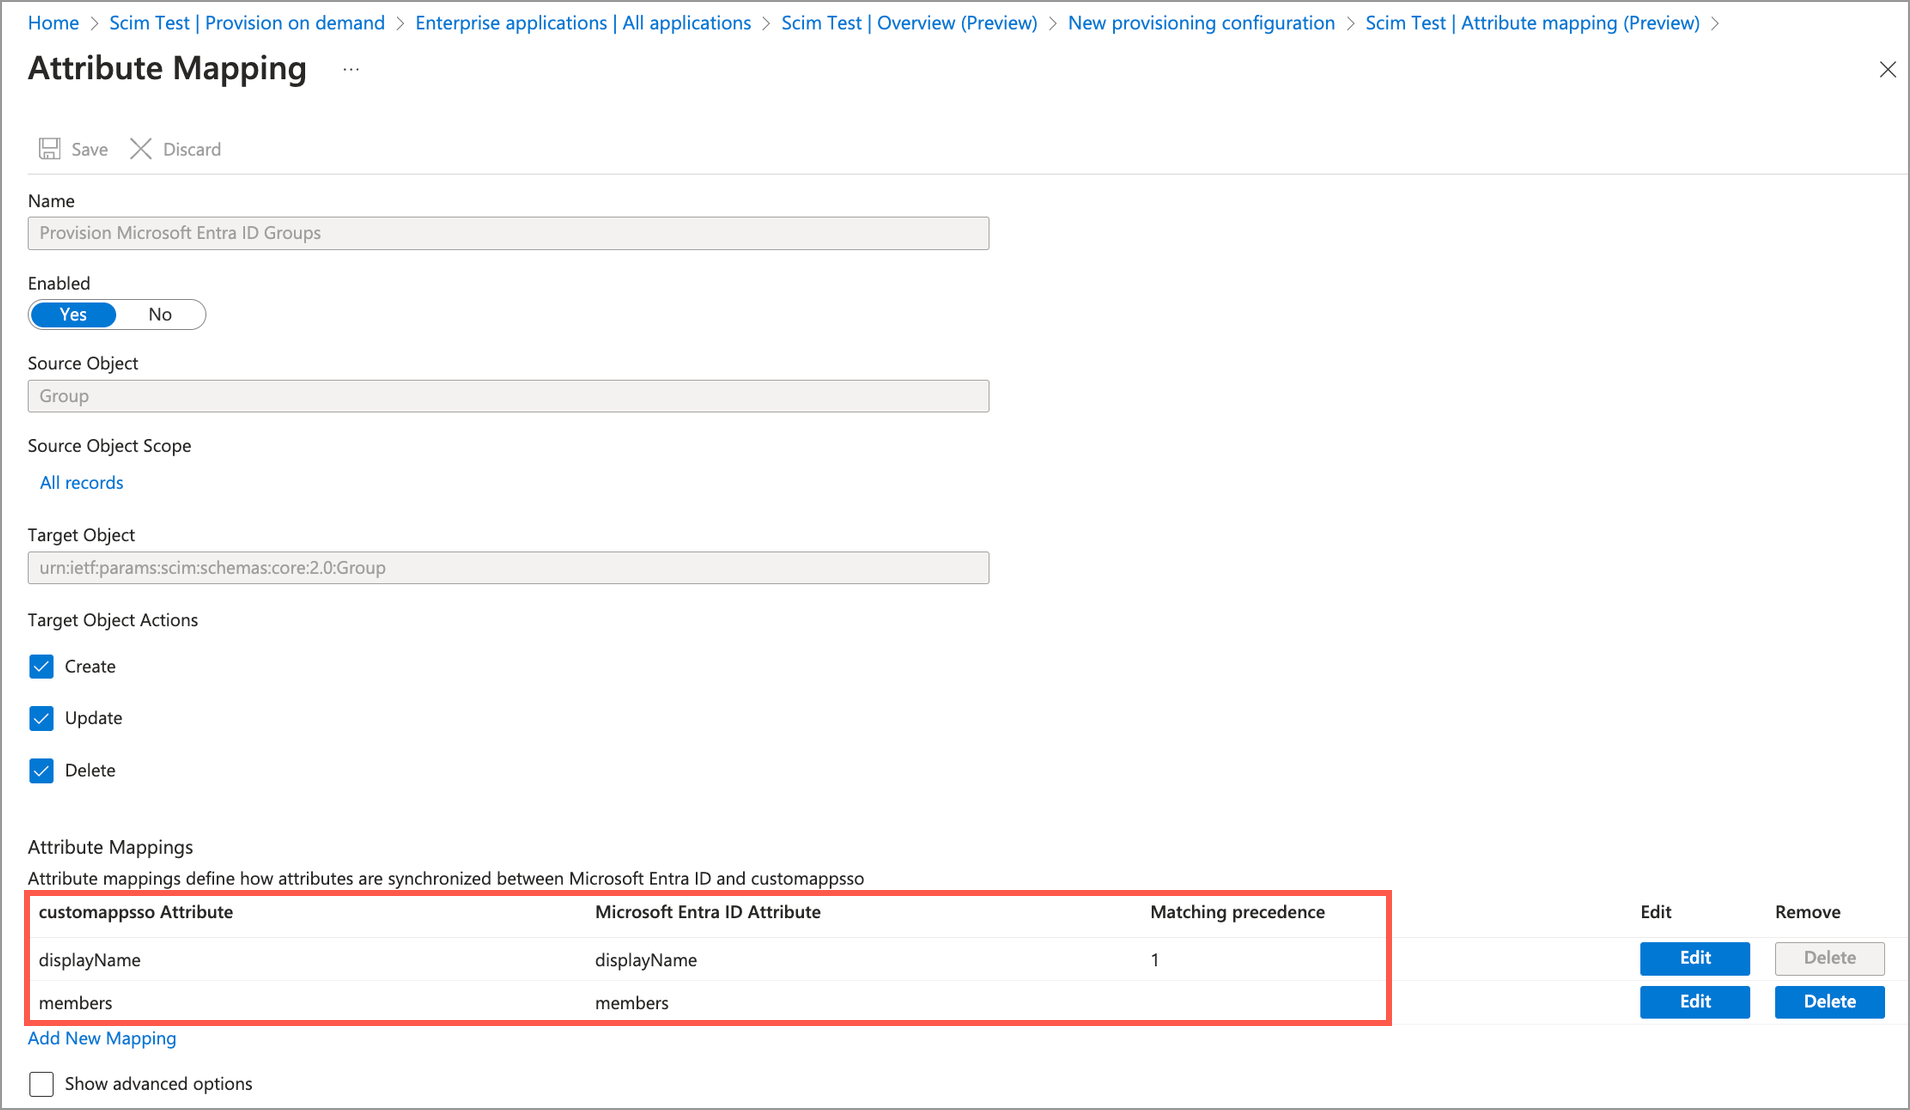
- Return to the list of mappings and click Provision Microsoft Entra ID Groups.
- In Target Object Actions, select Create, Update, and Delete.
-
In Attribute Mappings, delete every custommapsso Attribute mapping except the following:
- displayName
- members
When finished, your attribute mappings list should only contain the above mappings, as shown in the following screenshot.
- When finished, click Save.
After mapping Users and Groups for SCIM, you can start provisioning users and user groups in Visier.
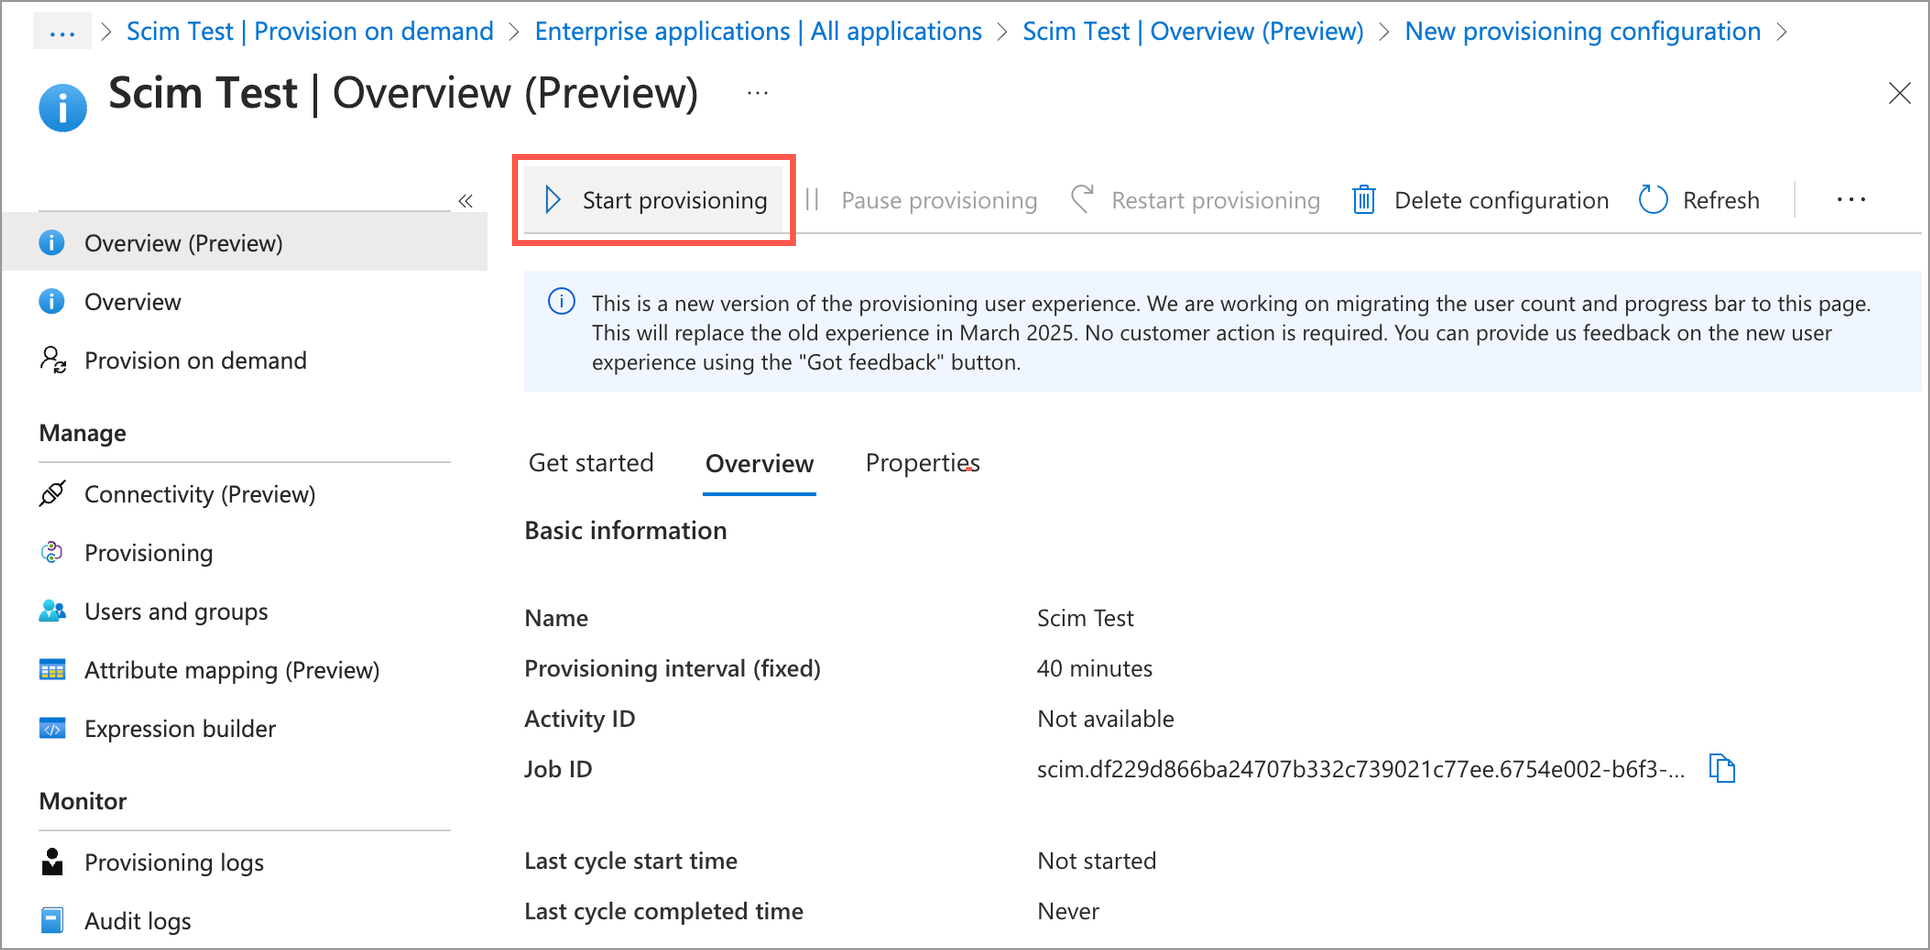
- On the navigation bar, click Overview.
- In the application's Overview, click Start provisioning, as shown in the following screenshot. This creates and deletes users and users groups in Visier based on the users and groups in Microsoft Entra ID.
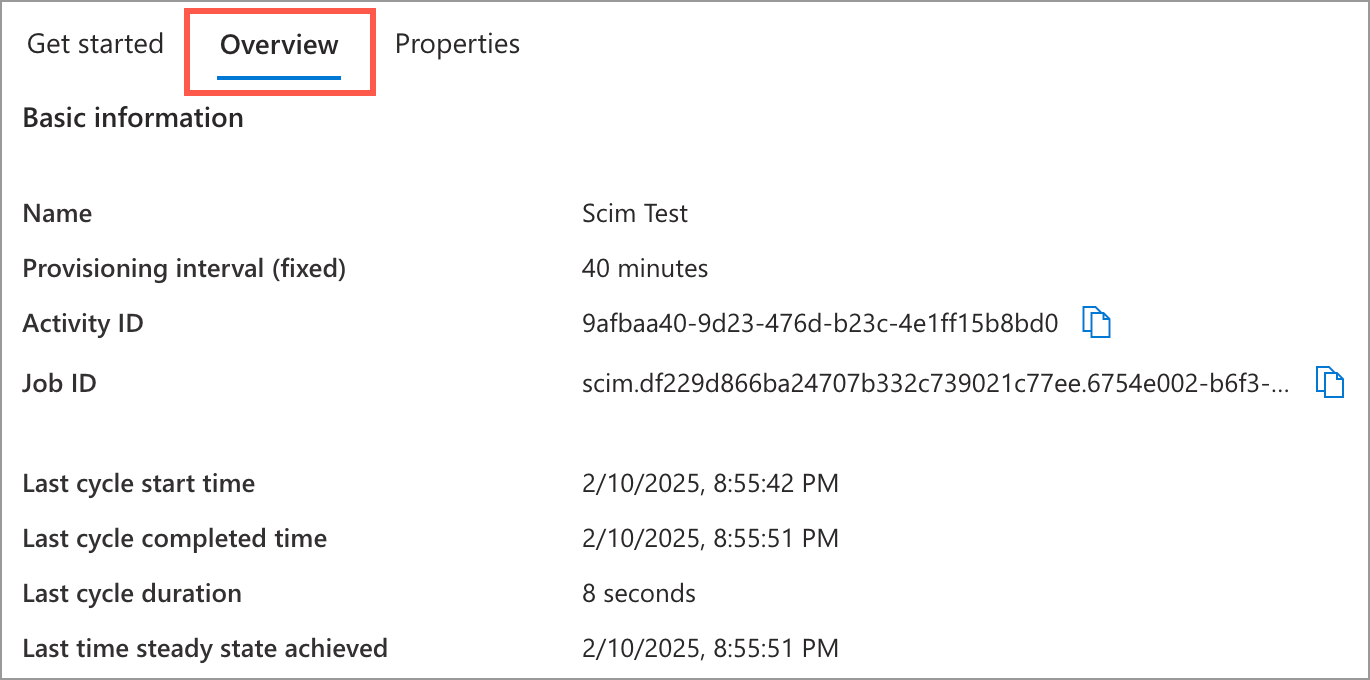
- After the provisioning cycle is stable, you can click Overview to see a summary, as shown in the following screenshot.
Now that you're set up in Visier and Microsoft Entra ID, you can make SCIM requests to Visier. For more information, see Step Three: Make SCIM requests.