
Set Up SCIM for Okta
Use Okta to synchronize the creation, deletion, and updating of users and user groups in Visier.
Note: Limited Availability This feature is in limited availability. If you are interested, please contact your
Overview
SCIM, the System for Cross-Domain Identity Management, automates how identity information is exchanged between two entities, such as your identity provider (IdP) and Visier. SCIM replaces manual user management and user group management in Visier. By setting up SCIM with Visier, you can reduce the effort it takes to create, modify, and synchronize employee accounts between your IdP and users and user groups in Visier.
This topic describes how to set up SCIM if your identity provider is Okta. For more information about setting up SCIM with Okta, see Create SCIM app integrations with entitlement management.
Okta SCIM in Visier synchronizes users from Okta to Visier. If you delete a user in Okta, SCIM deletes that user in Visier. If you delete a user in Visier, nothing happens to the user in your Okta. If you have existing user groups in Visier before setting up SCIM, you cannot import the groups to Okta or associate Okta groups to Visier user groups. Instead, recreate the groups in Okta to replace the existing Visier user groups.
Tip: For more information about general SCIM issues, see Troubleshooting.
Step One: Configure SCIM in Visier
Prerequisites: Create a service account user in Visier and assign the Visier Analytics User and Visier Cloud Administrator profiles to the user. This user executes all SCIM requests in Visier.
- On the global navigation bar, click Settings > SCIM Configuration.
- In the Public RSA Key box, paste the public key associated with your IdP JSON Web Token (JWT). The public key must be an RSA public key in PEM encoding as specified in RFC 7468 and supports the formats X.509 certificate, PKCS#1 RSAPublicKey, and X.509 SubjectPublicKeyInfo.
Example:
Copy-----BEGIN PUBLIC KEY-----
MIICIjANBgkqhkiG9w0BAQEFAAOCAg8AMIICCgKCAgEAoAF1T6ZubDUlCK1EJ1XX
…
-----END PUBLIC KEY----- - In the Issuer box, type the entity ID of the IdP. The issuer uniquely identifies the identity provider within the solution and must match the iss claim in the OAuth 2.0 bearer token provided by the IdP.
- In the Subject box, type the subject ID of the JWT. The subject is a unique identifier that must match the sub claim in the OAuth 2.0 bearer token provided by the IdP.
- In SCIM service account, select the user you created as part of the SCIM prerequisites.
- Optional: To set the network subnets that are allowed to make SCIM requests to Visier, in Network subnets, type the IP addresses using the Classless Inter-Domain Routing (CIDR) format: xxx.xxx.xxx.xxx/xx.
- When finished, click Save.
Result: The Visier side of SCIM is ready. You can now set up SCIM with Visier in your identity provider.
Step Two: Configure SCIM in Okta
To set up SCIM in Okta, turn on provisioning for the application. This allows Okta to provision users and groups in Visier.
- Sign in to Okta.
- In the Admin Console, click Applications > Applications.
- In the list of applications, select the application in which you want to set up SCIM with Visier.
- In General, under App Settings, click Edit.
- In the App Settings dialog, in Provisioning, select SCIM, as shown in the following screenshot.
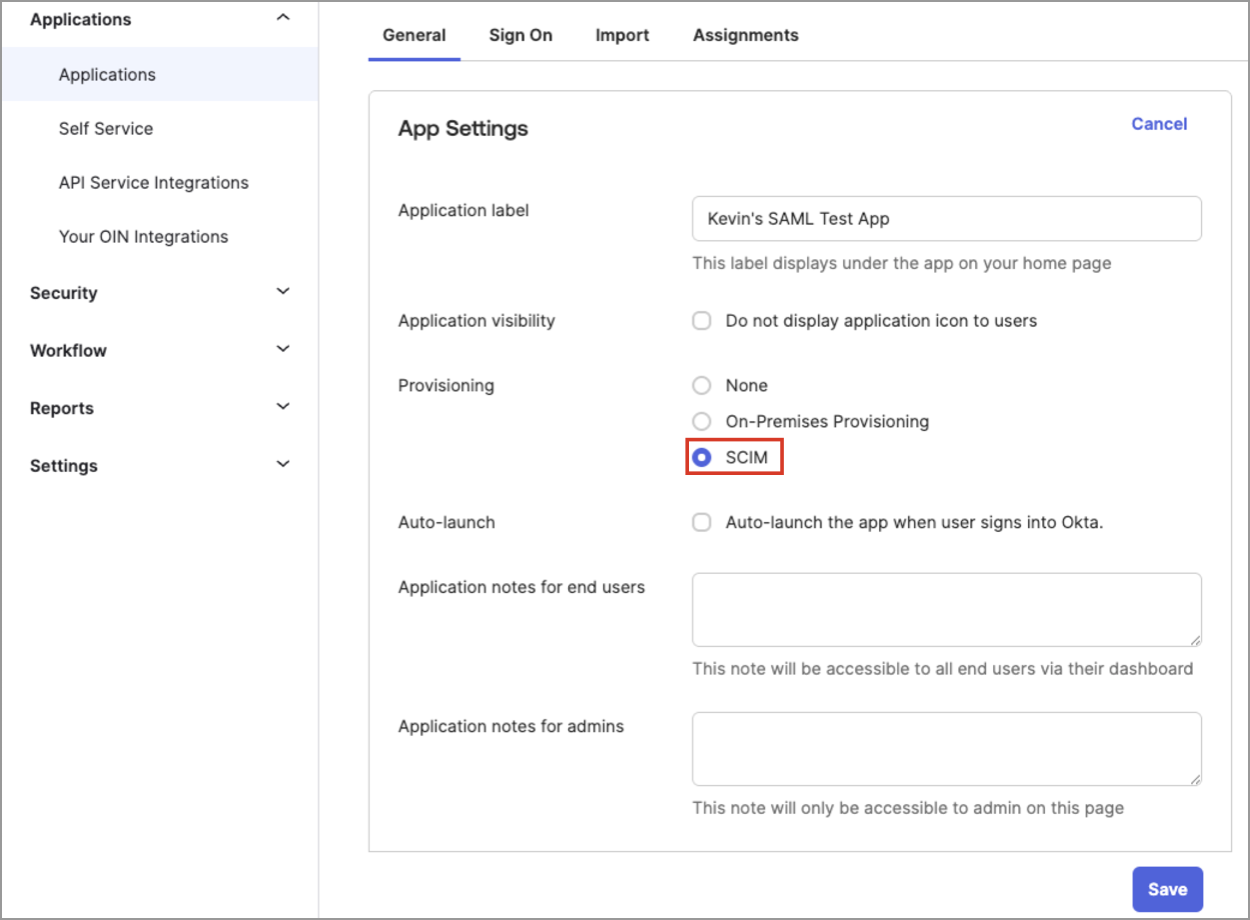
- Click Save.
Result: A Provisioning tab appears in the selected application.
Next, set your SCIM configurations. This tells Okta where to provision users and groups.
- In the selected application, click Provisioning.
- In Settings, click Integration.
- In SCIM Connection, click Edit.
- In the SCIM Connection dialog, do the following:
- In SCIM connector base URL, type https://{vanity_name}.visier.com/hr/scim/v2, where {vanity-name} is your Visier vanity name.
Tip:
To find your vanity name:
- In Visier, in the global workspace, click Settings > Single Sign-On.
- Under Single Sign-On, find your service provider endpoint; for example, https://jupiter.visier.com/VServer/auth. In this example, jupiter is the vanity name.
- In Unique identifier field for users, type userName.
- In Supported provisioning actions, select:
- Push New Users
- Push Profile Updates
- Push Groups
- In Authentication Mode, select HTTP Header.
- In HTTP Header, paste your bearer token. The bearer token must be signed by a private key and verifiable by the public key you provided in Step One: Configure SCIM in Visier.
- In SCIM connector base URL, type https://{vanity_name}.visier.com/hr/scim/v2, where {vanity-name} is your Visier vanity name.
- Click Save.
When finished, your integration settings should look similar to the following screenshot.

After creating the communication configuration between Okta and Visier, set your attribute mappings.
- In Provisioning, in Settings, click To App.
- In Provisioning to App, click Edit, and then select the following:
- In Create Users, select Enable.
- In Update User Attributes, select Enable.
- In Deactivate Users, select Enable.
- Leave all other settings disabled.
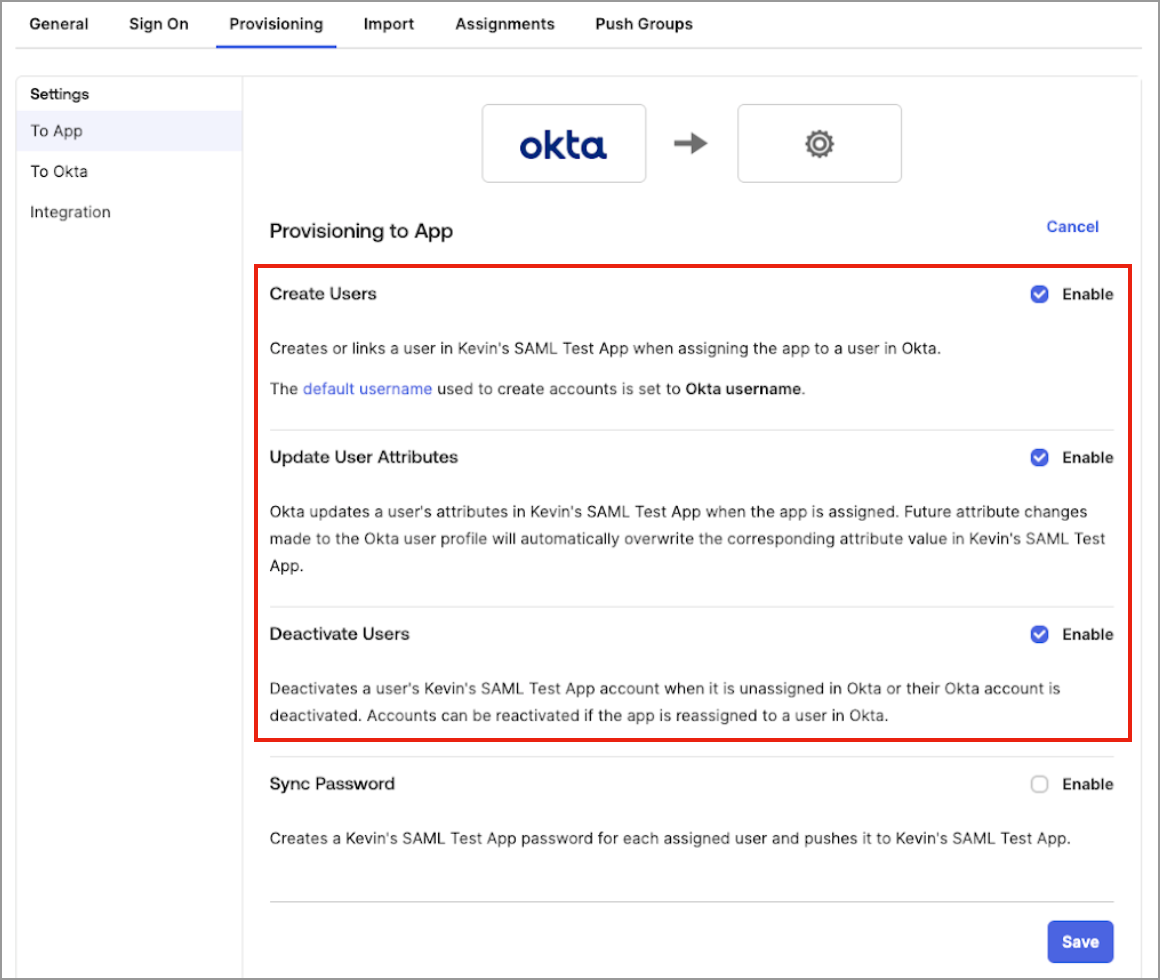
- Click Save.
- In Attribute Mappings, select the following attributes to sync with Visier:
- Username
- Given name
- Family name
- Display name
Employee number
Caution: Given name and family name are required attributes, however, Visier does not support them. Any changes in Okta to given name and family name are not synced to Visier. Instead, use display name for name changes.
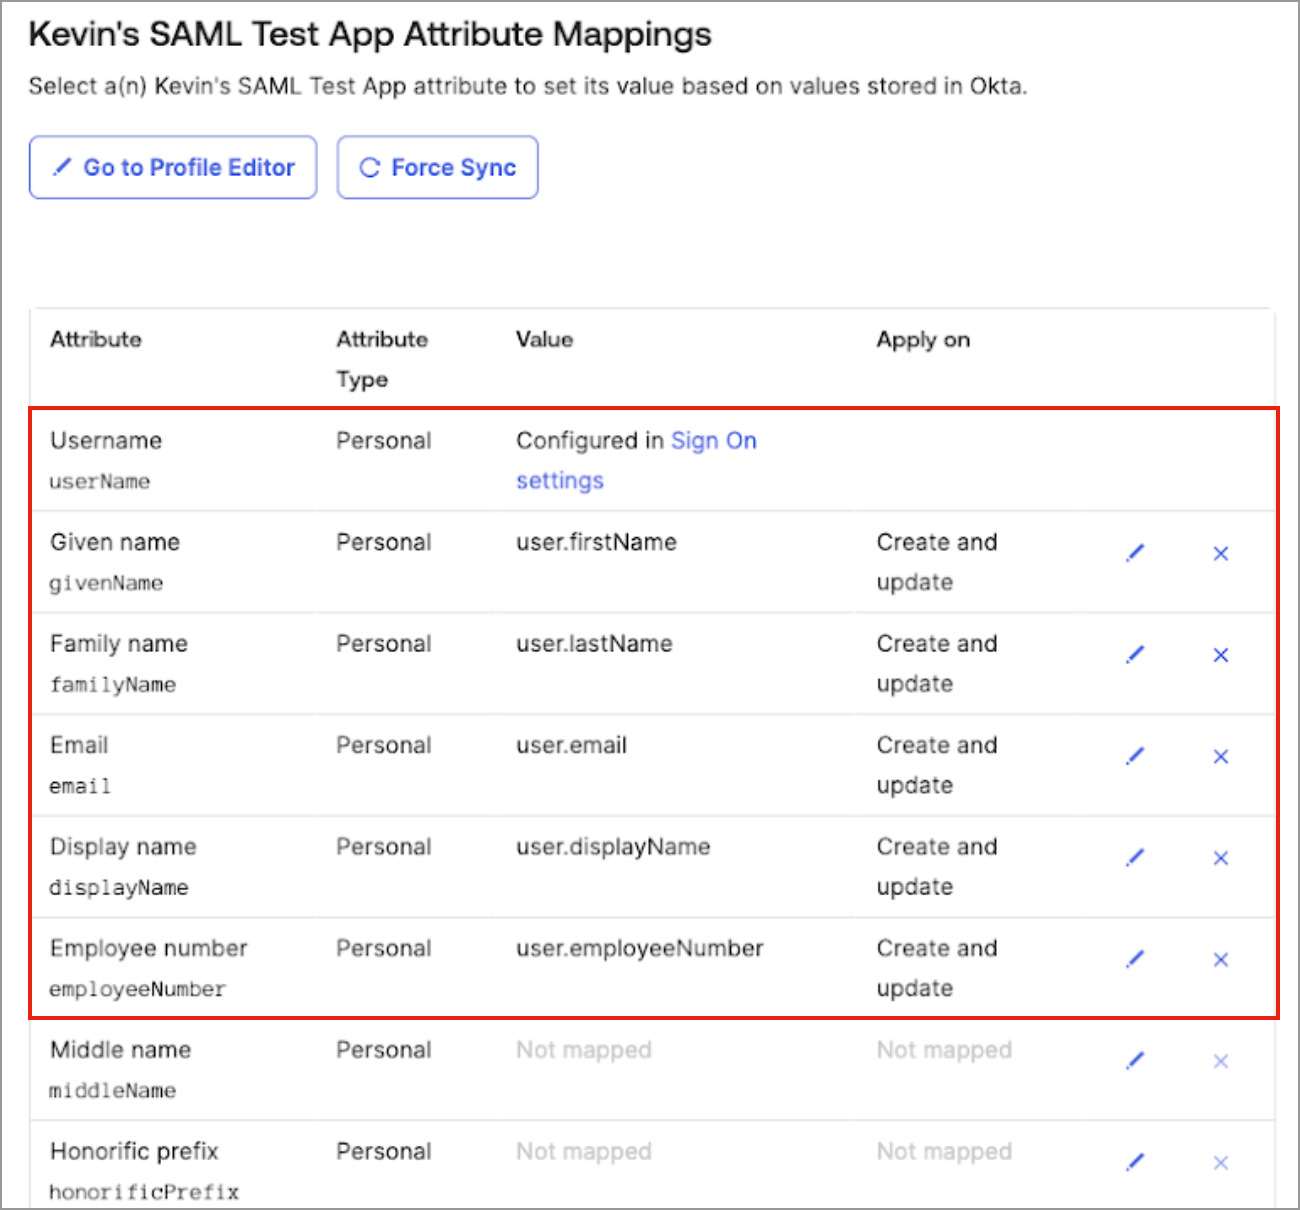
- Click Save.
Next, set up one-way syncing.
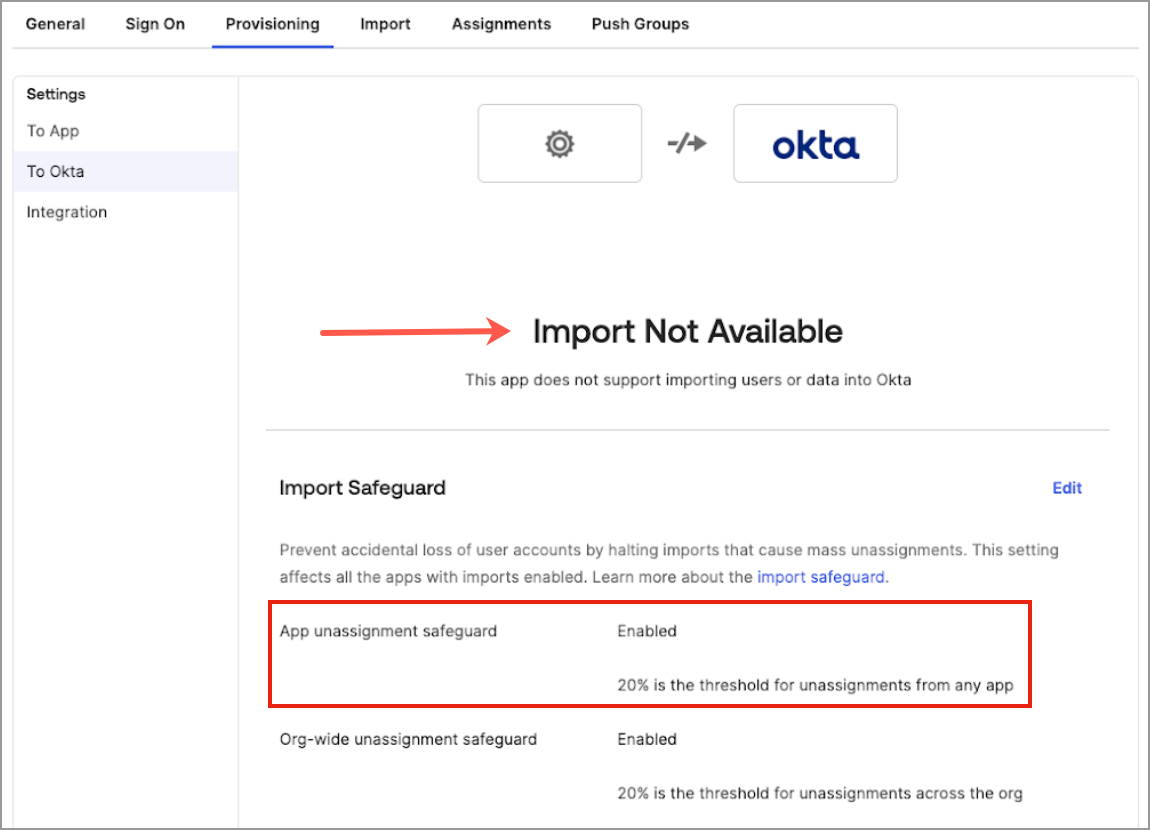
- In Provisioning, in Settings, click To Okta.
- Check that it says Import Not Available. This means that users who were manually added in Visier do not sync back to Okta.
- Optional: In Import Safeguard, set App unassignment safeguard to a low percentage, such as 20% or less. This prevents users who were manually deleted in Visier from syncing back to Okta.
Now that you're set up in Visier and Okta, you can make SCIM requests to Visier. For more information, see Step Three: Make SCIM requests.