
Detailed Table Visual
View records of subject members or event occurrences that make up a metric.
Who can use this feature?
Users with the following:
- Permission capabilities: View Details
Users without this capability can still view the visual if it is included in an analysis. They can explore it in full screen and change the analysis context, time context, and selected properties, but they cannot change the metric.
Not sure if you have this feature or capability? Reach out to your administrator.
Overview
The Detailed Table visual lists the subject members or event occurrences that contribute to a metric for a given population. Each row represents a single record with its attributes and values. The attributes available in this visual are determined by the user's data security access. The View Details setting for analytic objects do not apply to this visual.
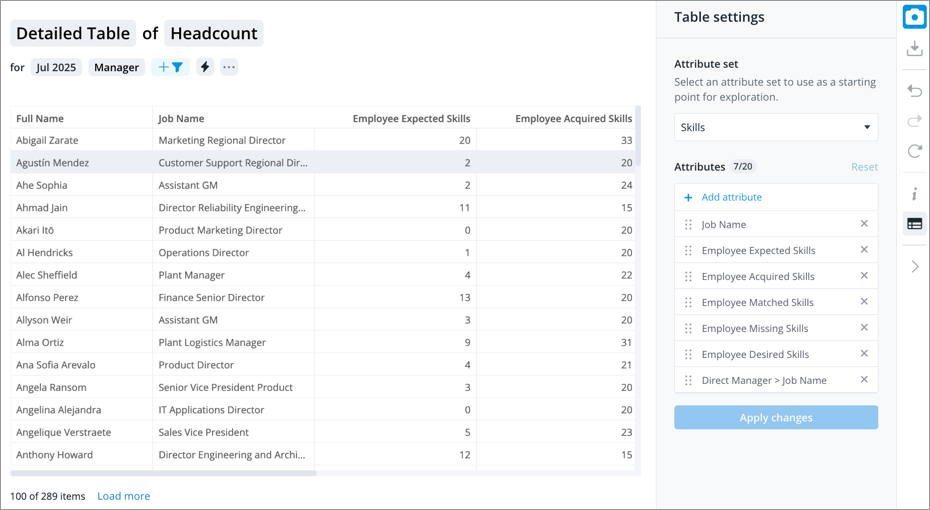
This visual allows you to efficiently spot patterns and identify the people and events behind each value. This consolidated view makes it easy to explore your data and uncover the why behind your metrics.
Note:
- A maximum of 100,000 cells can be displayed. If you receive the Too much data to display error message, reduce the data by applying filters or removing attributes, and then try again.
- A maximum of 20 attributes can be displayed.
- Overlay, projected, and plan metrics are not supported.
How to explore the visual to gain insight
- Scroll horizontally to review each record.
- View more records by clicking Load more in the lower-left corner of the visual.
- Add filters to view data for a specific group of employees or analysis population.
- Change the time context to show data for a specific point in time or time range.
- Sort the data in ascending or descending order by clicking a column header.
- Change the selected attributes by clicking the Table Settings button
 on the Visual Actions menu.
 - Select an Attribute Set to use as a starting point. Administrators can create and change the available Attribute Sets in Studio. For more information, see Customize an Attribute Set.
- Add or remove attributes in the Table Settings panel, click Apply changes when finished.