Add a Custom Message to an Unavailable Visual
If your users can't access a visualization due to insufficient data security or licensing, you can write a custom message to explain how to access the visualization, such as upgrading to a higher licensing tier.
Who can use this feature?
-
This is available to Embedded Partners
Users with the following:
- Permission capabilities: Create Captures & Analyses
Not sure if you have this feature or capability? Reach out to your administrator.
Note: Limited Availability This feature is in limited availability. If you're interested, please contact your Customer/Partner Success Manager.
Normally, if a user isn't able to view a visualization, the visual is dropped or hidden from view in an analysis. This sometimes causes users to see a blank analysis if they cannot access the visuals in an analysis. Optionally, administrators may choose to write a custom message for a visual that cannot be displayed.
Note: If you add a custom message to a visual, that message is shown if the viewer does not have access to content in the visual. This means that the same message is shown for any reason that the chart is unavailable, including security or other reasons.
By enabling this feature, you can provide guidance to a user who may otherwise see a blank analysis.
Write a custom message for an analysis visualization
Custom messages are added per visual. This means you must add a custom message to each visualization individually.
- Open a project. Changes to the visualization must be made in a project.
- Navigate to an analysis that you can edit. There are two ways to navigate to an analysis:
- On the navigation bar, click Model > Analyses.
- On the navigation bar, click Preview Solution, and then click Analyses
 .
.
- Hover over an analysis and click the Edit button
 . Make sure that you select an analysis that contains the visual that you want to add a custom message to.
 - Hover over a chart card and click the Edit card appearance button
 .
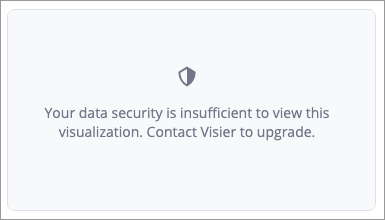
. - In the dialog box, under Custom message if visual is unavailable, type a custom message. The following screenshot is an example of the user-facing appearance of a custom message.

- When finished, click Save changes.
- Repeat steps 4-6 for all visualizations that require a custom message.
-
When finished, publish your project to production. For instructions, see Publish Project Changes.
