

Filter a Report by Time-Based Attributes
Choose a fixed period, a custom date range, or a rolling time window to see past or upcoming records.
Access requirements
Permission with these capabilities: Write Report
Reach out to your administrator for access.
Overview
Subjects (such as employees or requisitions) and events (such as promotions or pay changes) are associated with different time-based attributes, like Start Date. Filtering by these attributes allows you to isolate specific records within historical or future timeframes. For example, you can filter by Start Date to focus on employees who joined last quarter. You can also look ahead and filter by Expected Start Date to see new hires starting next month.
When you select a time-based attribute, you can choose from the following filtering options:
-
Fixed time filter: Filters by a time period or time range, such as the first quarter of 2026.
-
Custom date range: Sets specific or open-ended dates, such as January 1, 2026 to March 15, 2026.
-
Dynamic time filter: Filters by a rolling time window based on the report period or current date. The time window updates automatically, relative to an anchor date, so you don't need to recreate the filter.
Filter by a fixed time or custom date range
-
In the report editor, click Add a filter and select a time-based attribute. For example, Start Date.
- Do one of the following:
To Do this Apply a fixed time filter If you have multiple calendars, select a calendar.
- Select the time granularity.
- Select the number of periods.
- Drag and slide the time window along the timeline to select the time period or range of periods you want to filter by.
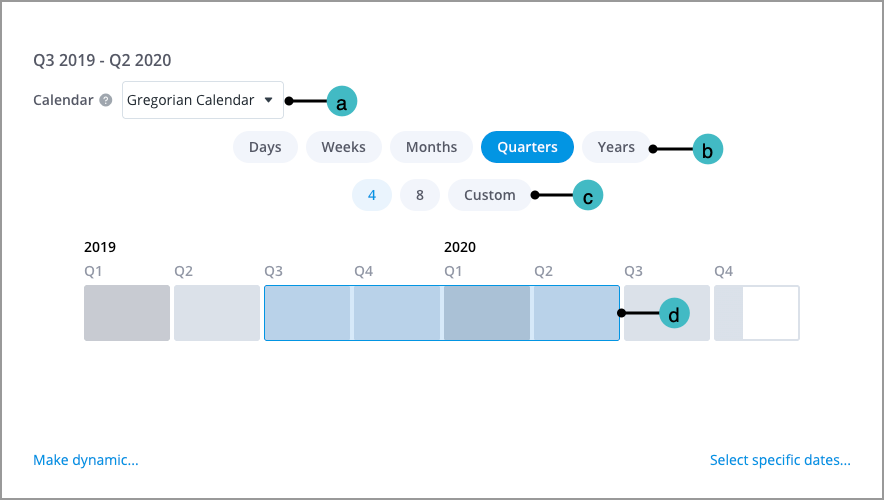
Note: The time window can be configured for a business calendar. To change the configuration, contact your administrator.
Apply a custom date range filter.
Use this option to select open-ended dates and dates outside the data range.
- Click Select specific dates in the lower-right corner of the Filter picker.
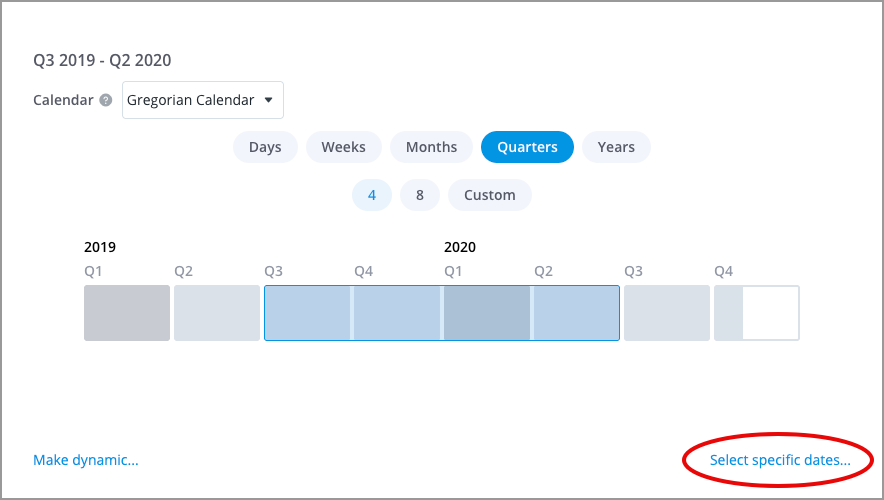
- Select a custom date range using the Gregorian calendar.
Tip: Open-ended dates
Clear either calendar to filter by an open-ended date. For example, to create a before date filter, clear the From calendar and select a date in the Up to calendar (for example, Start Dates before February 1, 2019).
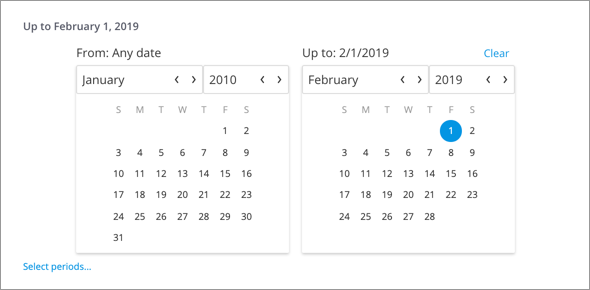
- When finished, click Apply.
Tip: To filter by a rolling time window, see Apply a dynamic time filter.
Apply a dynamic time filter
A dynamic time filter counts backward or forward from an anchor date. As the anchor date moves, the time window moves with it.
-
In the report editor, click Add a filter and select a time-based attribute. For example, Expected Start Date.
-
Click Make dynamic in the lower-left corner of the Filter picker.
Result: The Select a dynamic time preset dialog opens.
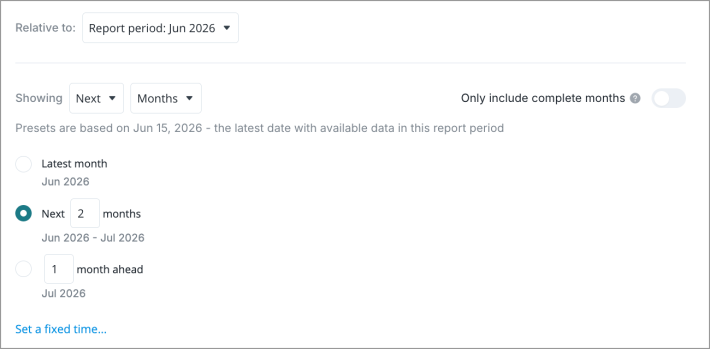
- In the Relative to list, select the anchor date.
- Report period: Sets the anchor date to the latest date with available data in the report period. For example, if the report period is June 2026 and data is available up to June 15, 2026, the anchor date is June 15, 2026. The anchor date changes when the report period changes.
Current date: Sets the anchor date to today's date in Coordinated Universal Time (UTC). The anchor date shifts forward automatically every day. Depending on your time zone, your local date may differ from the UTC date by up to one day.
- In the Showing list, select the time direction.
- Previous: Filters backward from the anchor date.
- Next: Filters forward from the anchor date.
-
Select the time granularity, such as Days, Months, and Years.
Note: The time granularity that you define when setting a dynamic time filter is used to calculate report records even if the selected time granularity at the report level is different.
- Optional: Turn on the Only include complete months toggle to leave out the partial period that contains the anchor date. The toggle label matches the granularity you select. By default, the toggle is off, and presets include the whole period that contains the anchor date.
-
Select a dynamic time preset. For presets with a number field, enter the number of periods. For more information, see Dynamic time presets.
Note: Last N period(s) and Next N period(s) require a value of 2 or more.
-
When finished, click Apply.
Dynamic time presets
The available dynamic time presets depend on the time direction and granularity you select. The following table shows how each preset calculates report records, using an anchor date of January 15, 2020 with the Only include complete months toggle turned off.
| Time filter direction | Dynamic time preset | Details | Example |
|---|---|---|---|
|
Previous or Next |
Latest period |
The period that contains the anchor date. |
Latest month includes employees whose Start Date is in January 2020. |
|
Previous |
Same period, previous year |
The period containing the anchor date, one year earlier. |
Same month, previous year includes employees whose Start Date is in January 2019. |
|
Previous |
Last N period(s) |
A range of periods that ends with the period containing the anchor date. |
Last 2 months includes employees whose Start Date is in December 2019 or January 2020. |
|
Previous |
N period(s) ago |
A single period before the period containing the anchor date. |
3 months ago includes employees whose Start Date is in October 2019. |
|
Next |
Next N period(s) |
A range of periods that starts with the period containing the anchor date. |
Next 2 months includes new hires who are expected to start in January 2020 and February 2020. |
|
Next |
N period(s) ahead |
A single period after the period containing the anchor date. |
2 months ahead includes new hires who are expected to start in March 2020. |
When the Only include complete months toggle is on, presets skip the period that contains the anchor date. For example, Next 2 complete months includes new hires who are expected to start in February 2020 and March 2020.