

Customize Vee Sample Prompts
Add, remove, or edit the sample
Access requirements
Profiles: Basic Model Developer
Custom profile with these capabilities: Model (Write, Simple)
Reach out to your administrator for access.
Overview
Note: If you don’t have Vee 2.0, sample prompts are called sample questions. For the labels you’ll see, select the Vee tab in Customize sample prompts.
Vee provides a set of sample
You can:
- Add, edit, hide, and delete sample
- Add user groups to sample
- Add, edit, and delete sample
Workflow
To customize the sample
- In a project, on the navigation bar, click Model > Vee.
- Make your changes.
- When finished, publish your project to production. For instructions, see Publish Project Changes.
Customize sample prompts
The steps are the same in both Vee experiences. However, the labels you see in Studio and where users find these samples differ. Select your experience below. For more information, see Determine your Vee experience.
- Vee 2.0
- Vee
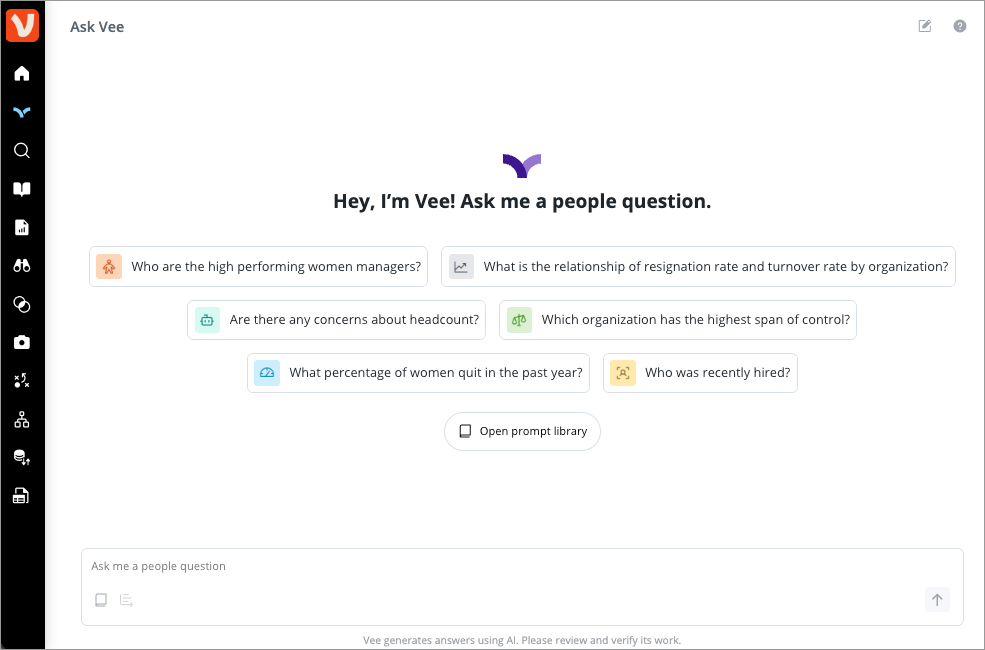
You can create and manage sample prompts in the Prompt library tab. Users see sample prompts in the conversation interface and in the Sample prompts section of their prompt library. For more information, see Save and Reuse Vee Prompts.
Note: Vee only shows existing sample prompts when the data to answer them exists. Vee doesn’t perform this check for new or customized prompts. If you add or customize a prompt, you will need to test and validate that Vee returns a response.
Add a sample prompt
-
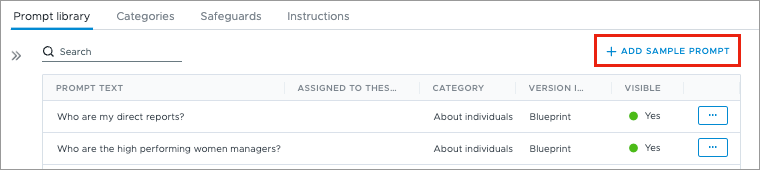
Click Add sample prompt.
- In the Prompt category page of the New prompt dialog:
- Select the category the prompt belongs to.
- Click Next.
- In the Prompt content page of the New prompt dialog:
- Enter the prompt text.
- Show or hide the prompt using the Visible toggle.
- Add user groups to the prompt.
-
When finished, click Create.
For ideas on the types of sample prompts you can add, see Vee Sample Prompt Examples.
Change the sample prompt text
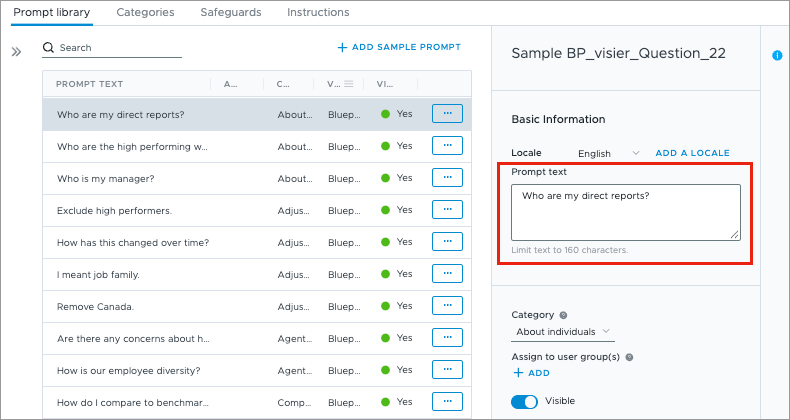
- Select a prompt in the Prompt library tab.
- Edit the prompt text in the Info panel.
Change the sample prompt category
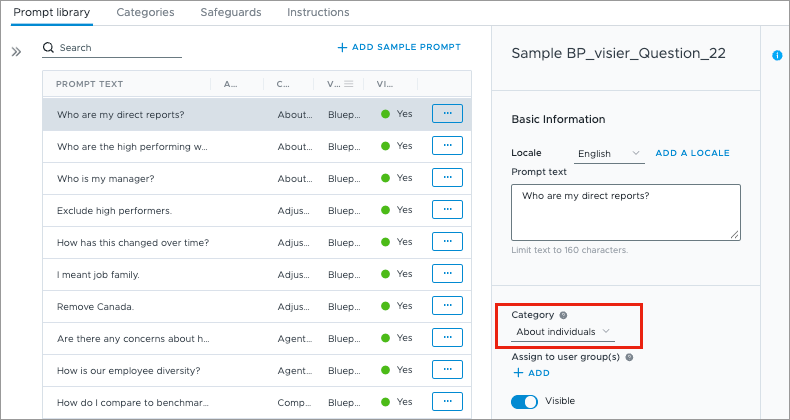
- Select a prompt in the Prompt library tab.
-
Select the category the prompt belongs to in the Info panel.
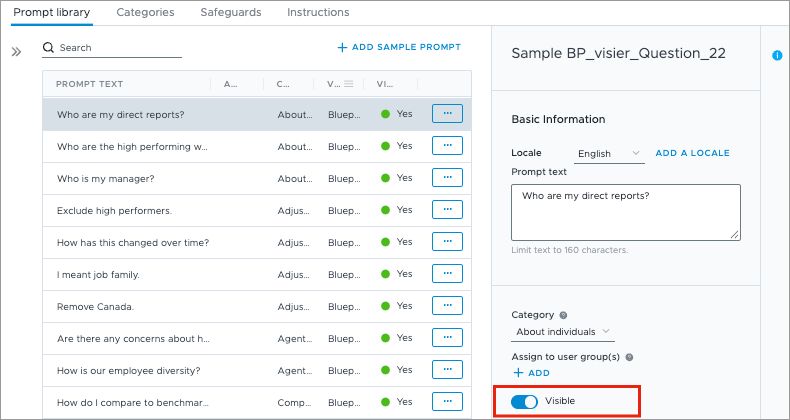
Change the visibility of a sample prompt
- Select a prompt in the Prompt library tab.
- Click the Visible toggle in the Info panel to show or hide the prompt.
Delete a sample prompt
- In the Prompt library tab, click the More actions button next to the prompt.
- Click Delete.
Add user groups to sample prompts
To keep sample prompts relevant, add user groups to sample prompts to show users prompts that match their data access and availability. For more information on how to create a user group, see Create a User Group.
Note: User group assignments only control which sample prompts users see. They are not a replacement for data security or content access. Use security, content packages, and the Include with Vee setting to specify what users can access through Vee.
- Select a prompt in the Prompt library tab.
- In the Info panel, under Assign to user group(s), click Add.
- Select the user groups you want to add the sample prompt to.
- Click Confirm.
- Optional: Repeat steps 1-4 to add more sample prompts.
If you add a user group to a prompt, only users in that user group see that prompt. Users see:
- Prompts assigned to their user group.
- Prompts with no user groups assigned.
Prompts assigned to other user groups don’t appear. If users aren’t in any user groups, or their user groups aren’t assigned to any prompts, they only see prompts with no user groups assigned.
For example:
- Users in the Executives user group are assigned two sample prompts. Another prompt is assigned to the Managers user group. No other prompts have user groups assigned. Users in the Executives user group would see every sample prompt except the one assigned to Managers.
- A user isn’t in any user groups, and three sample prompts are assigned to user groups. The user sees every sample prompt except those three.
You can create and manage sample questions in the Sample questions tab. Users see sample questions in the conversation interface and in the More sample questions list.
Note: Vee only shows existing sample questions when the data to answer them exists. Vee doesn’t perform this check for new or customized questions. If you add or customize a question, you will need to test and validate that Vee returns a response.
Add a sample question
-
Click Add sample question.

- In the Question category page of the New question dialog:
- Select the category the question belongs to.
- Click Next.
- In the Question content page of the New question dialog:
- Enter the question text.
- Show or hide the question using the Visible toggle.
- Add the question to user groups.
-
When finished, click Create.
For ideas on the types of sample questions you can add, see Vee Sample Prompt Examples.
Change the sample question text
- Select a question in the Sample questions tab.
- Edit the question text in the Info panel.

Change the sample question category
- Select a question in the Sample questions tab.
-
Select the category the question belongs to in the Info panel.

Change the visibility of a sample question
- Select a question in the Sample questions tab.
- Click the Visible toggle in the Info panel to show or hide the question.

Delete a sample question
- In the Sample questions tab, click the More actions button next to the question.
- Click Delete.
Add user groups to sample questions
To keep sample questions relevant, add user groups to sample questions to show users questions that match their data access and availability. For more information on how to create a user group, see Create a User Group.
Note: User group assignments only control the order in which users see the sample questions. They are not a replacement for data security or content access. Use security, content packages, and the Include with Vee setting to specify what users can access through Vee.
- Select a question in the Sample questions tab.
- In the Info panel, under Set as default for user groups, click Add.
- Select the user groups you want to add the sample question to.
- Click Confirm.
- Optional: Repeat steps 1-4 to add more sample questions.
If you add a user group to a question, that question is spotlighted for users in that user group and appears first in the list of sample questions in the conversation interface. The conversation interface displays up to six sample questions at a time. The questions users see depends on how many you assign to their user group:
- More than six questions: Users see six random questions from the assigned questions.
- Six or fewer questions: Users see all the assigned questions first. If you assign fewer than six, other sample questions randomly fill the remaining spots.
Assigning user groups doesn’t hide any questions. Users can still see all sample questions, including questions assigned to other user groups, by clicking More sample questions.
Customize categories
You can create and manage categories in the Categories tab.
Create a category
- Click Create category in the upper-right corner of the Categories tab.

- In the Info panel, type a display name and description.
- Optional: To assign a background color to the category icon, in the Background color field, type a hex code or select a color.
- Optional: To upload an icon for the category, in the Image field, click Upload. The icon will be visible in the Vee conversation interface.
Note: You can add a JPG or PNG image. Images must be smaller than 5 MB.
Change a category's details
- Select a category in the Categories tab.
- Modify the category's details, such as the display name or icon.
Delete a category
- In the Categories tab, click the More actions button next to the category.
- Click Delete.