
Create and Assign Tags to Content
Learn how to create new tags and assign tags to content, such as analyses and guidebooks.
Tags are user-defined categories that are used to group and identify related content in your solution. For example, the Compensation tag is assigned to all compensation-related content, such as the Compa Ratio metric, the CEO Pay Ratio Items concept, and the Discover Compensation Insights analysis, among others.
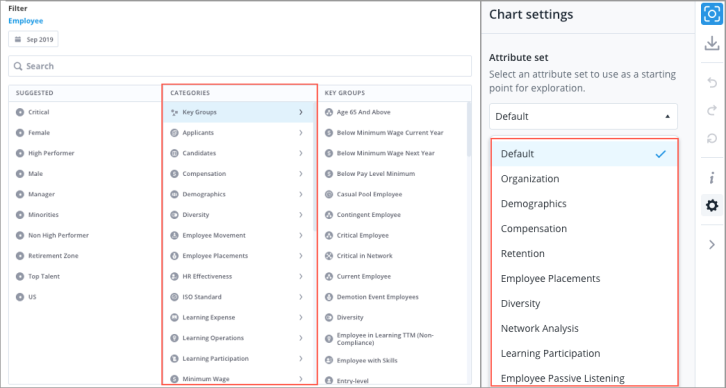
In the solution experience, tags show up in the following ways:
- As Categories in the Metric, Group By, and Filter pickers.
- As Attribute Sets in the Compare room, the Detailed View visual, the History visual, and Detailed Data Exports.
Administrators can create new tags in a project. To create a tag:
- In a project, on the navigation bar, click Model > Tags.
- Click Create Tag.
- Type a display name and description.
- Click Create.
- Optional: To assign a color to the tag, in the Color field, type a hex code or select a color. You can use this to match the tag color to its associated guidebook, for example, #0195e3 for Organization.
- Optional: To upload an icon for the tag, in the Icon field, click Upload. The icon will be visible in the Categories in the solution experience.
Note: You can add a JPG, PNG, or GIF image. Images must be smaller than 5 MB.
After creating a tag, you can assign that tag to content in your solution. For example, you might want to assign the tag to any relevant metrics, concepts, and dimensions so that they appear in the tag category in the Metric, Group By, and Filter pickers.
To assign a tag, do one of the following:
- For analyses, concepts, dimensions, metrics, predictions, properties, and standardizations:
- In a project, select the object that you want to assign the tag to.
- Click the Basic Information tab.
- In the Basic Information tab, under Tags, click the Add button
 .
. - Select the tags you want to assign to the object, and then click Add.
- For analytic objects:
- In a project, select the object that you want to assign the tag to.
- Click the Settings tab.
- In the Settings tab, under Tags, click the Add Tags field.
- Search for and select the tags you want to assign to the object.