
Manage and Commit Project Changes
Make changes in a project and commit them as a project revision to make them available to collaborators.
Overview
The Changes tab in the project home is where you'll manage and review the changes that have been made in the project.
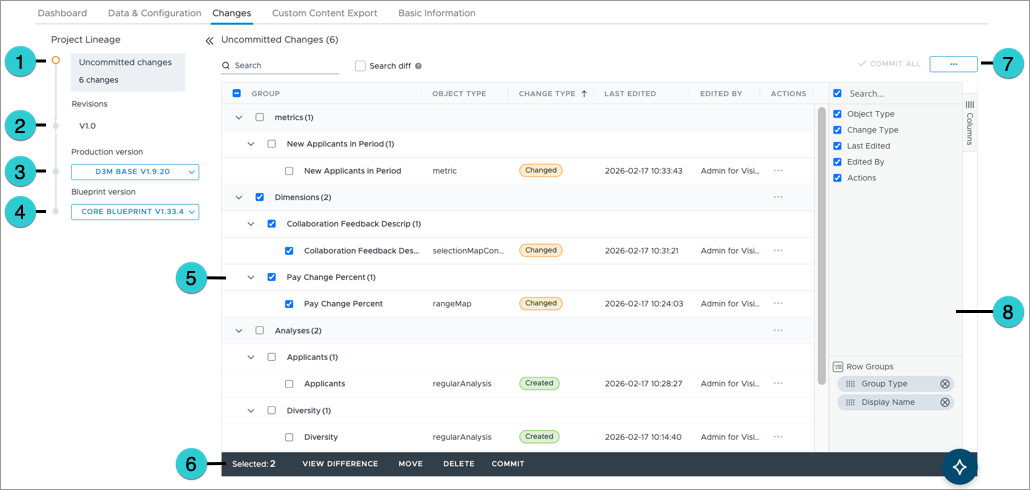
- Uncommitted changes: View a list of the uncommitted changes you've made to the project.
- Revisions: View a list of the committed changes for the project.
- Production version: Contains changes made to the standard objects and content provided by the Visier blueprint version.
- Blueprint version: Contains all of the standard objects, content, and solution configurations provided by Visier.
- Changelist: A summary of the uncommitted changes, changes in a revision, or changes in a production version.
- Changes Action menu: Perform actions to the selected changes.
- Bulk Action menu: Perform bulk actions to the changelist.
- Configure view: Customize the changes view by selecting the columns to display and how they are grouped. To change the grouping, drag and drop a column into the Row Groups.
Tip: Hover over any column header and click the menu icon to access filters, pinning, or grouping. You can also use this menu to autosize columns, manage row expansion, and reset your layout.
Prerequisites: If you're not the owner of the project, you must have the Edit or Share permission to perform the following tasks.
Make changes in a project
-
On the global navigation bar, click Projects.
- Select a project.
- Make changes in the project. For more information about the changes you can make, see Navigate Studio.
Note:
- Your changes will be added to the project as uncommitted changes. Review these changes in the Changes tab in the project home.
- Uncommitted changes will not be visible to collaborators.
Commit changes as a project revision
-
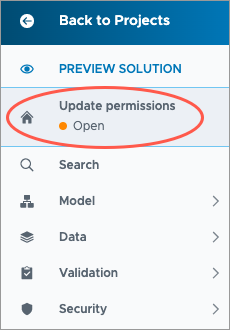
In a project, on the navigation bar, click the Home button
 .
.
-
Click the Changes tab in the project home.
- Select the changes you want to commit and then click Commit on the Changes menu.
- In the Commit Changes to Project Revision dialog, type a name and description for the project revision.
- Click Commit now.
Result: A project revision is created and shared with collaborators.
Note: If another user creates a new revision while you were making changes, you'll have to update your changes to the latest project revision before you can commit your changes. For more information, see Merge Project Changes.
Restore a previous project revision
-
In a project, on the navigation bar, click the Home button
.
-
Click the Changes tab in the project home.
- Select the revision you want to rollback to in the Revisions list.
- Click Rollback to revision.
Result: The changes in the revision will be merged with any uncommitted changes you have for the project.
- Commit the changes to the project.