Set Up API Access
Create an API user, assign profiles and permissions, and retrieve authentication credentials for your users.
Overview
This guide explains the tasks administrators need to do to get their users set up using Visier APIs. Visier’s APIs enable automation opportunities with Visier’s platform capabilities and integration of Visier’s highly curated data within your technology landscape.
Visier APIs are organized around RESTful concepts wherever possible. All requests return a JSON response.
Note: The API user account must use a username and password to access the APIs. If your organization uses sign sign-on (SSO), you must add your API users to the Bypass Users list so that the user accesses Visier with a username and password. For more information, see Set Up Single Sign-On.
To set up API access, do the following:
-
Create an API user. See Step One: Create a user account for the API user.
Note: Skip this step if you want to assign API access to an existing user account.
- Assign profiles to the user. See Step Two: Assign an API profile to the API user.
- Assign permissions to the user. See Step Three: Assign the correct data access permissions to the API user.
- Retrieve a unique API key. See Step Four: Retrieve an API key.
- Retrieve a security token. See Step Five: Retrieve a security token.
- Set the IP addresses that can call Visier APIs. See Step Six: Set up API network subnets.
Step One: Create a user account for the API user
Administrators can either create a new user account or assign an API profile to an existing user for working with Visier APIs. If assigning an API profile to an existing user, skip to Step Two: Assign an API profile to the API user.
Tip:
- We recommend creating a service user for automation or integration scenarios with Visier APIs. For security best practices, we do not recommend using service users like a shared account across different organization departments or different teams.
- If you have multiple teams that require developer access to Visier APIs, we recommend that you create a unique API user account for each team. We do not recommend using unique API user accounts for automation or integration scenarios.
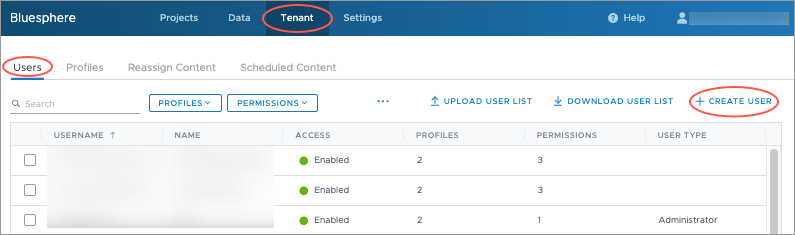
To create an API user, see Create users individually.
The following screenshot shows the location to create a user in the global workspace: Tenant > Users > Create User.
Step Two: Assign an API profile to the API user
Administrators can assign an API profile to user accounts. All tenants contain a default API profile that you can assign to the API user. The default API profile enables API users access to the APIs relevant for the tenant.
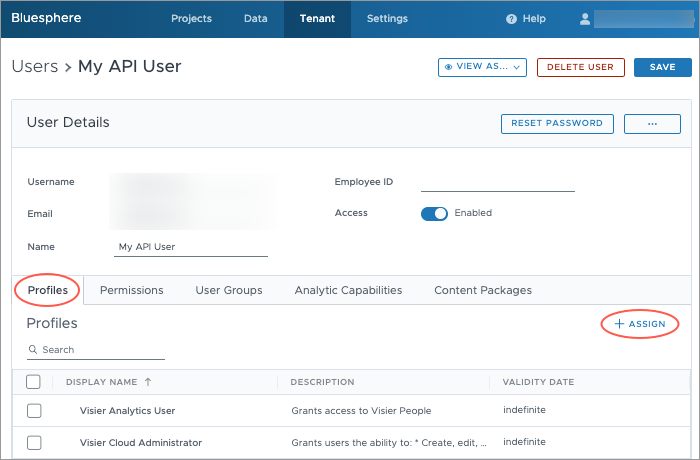
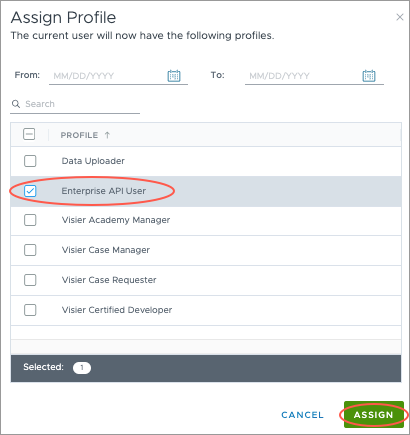
To assign a profile to an API user, see Manage the profiles assigned to a user. Visier provides a default API profile called Enterprise API User.
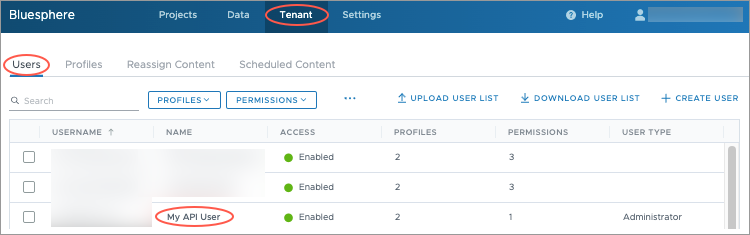
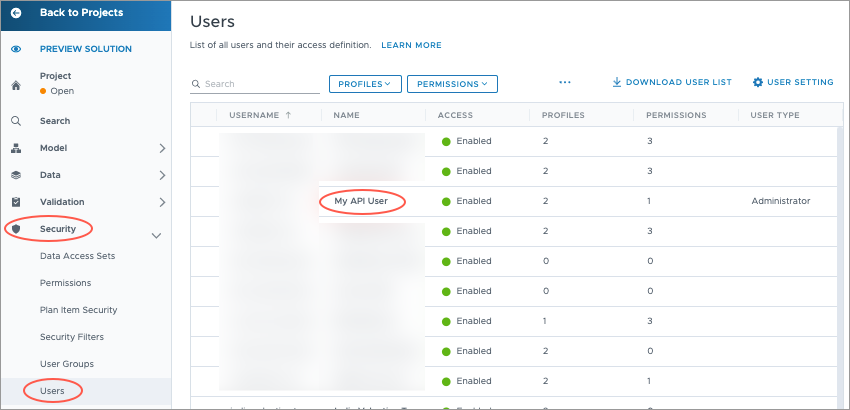
The following screenshot shows how to select an API user in the global workspace: Tenant > Users > Select an API user.
The following screenshots show how an administrator can assign an API profile to the selected user: Assign > Select an API profile > Assign.
Step Three: Assign the correct data access permissions to the API user
If working with the Data Model API and Data Query API, you must grant access to data to the API user. For more information about permissions, see Data and Content Security.
To assign permissions to a user, see Assign permissions individually.
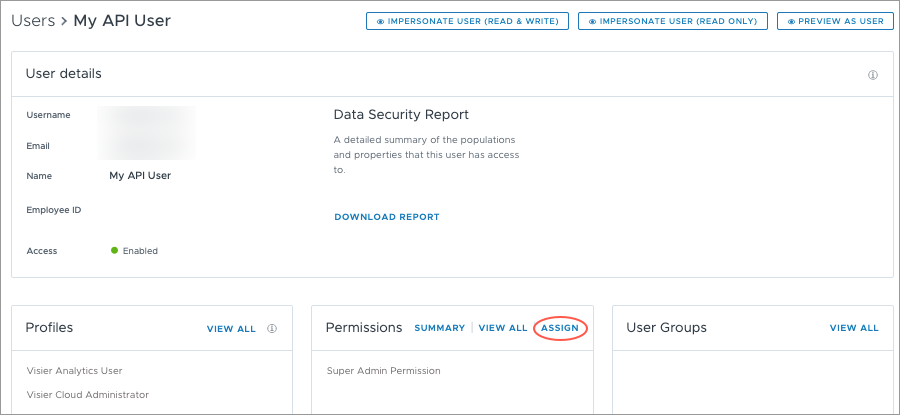
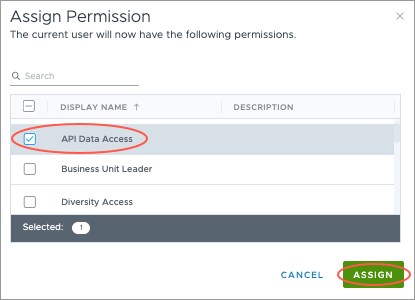
The following screenshots show how to assign permissions to a user in a project.
Note: The permissions that you assign will be unique to your organization.
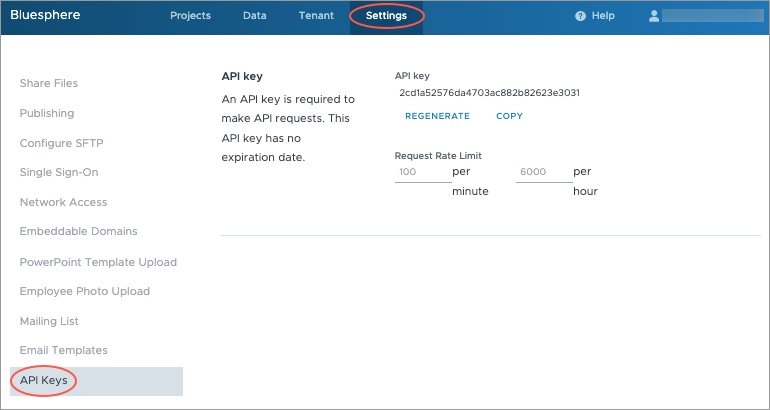
Step Four: Retrieve an API key
Administrators can retrieve an API key without Visier’s assistance. A valid API key is required to make requests to the Visier API.
To retrieve the API key, see Generate an API Key.
The following screenshot shows the location to retrieve an API key in the global workspace: Settings > API Keys.
Step Five: Retrieve a security token
Each request to Visier's APIs must contain both the API key and a security token.
To generate a security token, make the following API request with your unique URL, username, and password.
curl -X POST --url https://jupiter.api.visier.io/v1/admin/visierSecureToken -d "username=john@jupiter.com" -d "password=password"Tip: The security token has a 60 minute expiration window. Ensure that you systematically request a new security token when one expires.
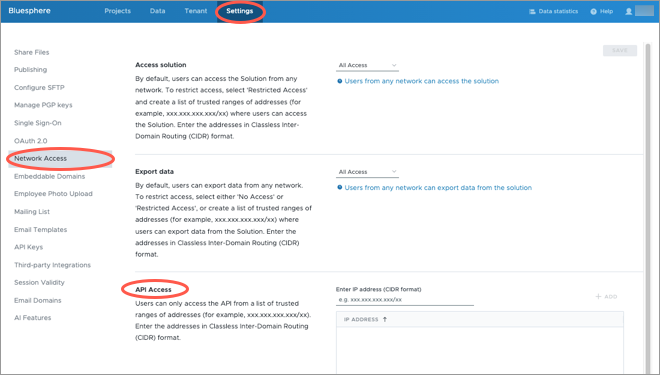
Step Six: Set up API network subnets
API users must call Visier APIs from one of the allowed network subnets. To set the allowed IP addresses, see Set Up Network Access. The following screenshot shows the location to set API network subnet access.