
Report Editor
Learn more about the Report Editor and how to configure your report for viewers.
Access requirements
Permission with these capabilities: Write Report
Reach out to your administrator for access.
The Report Editor
The Report Editor is what you will use to create and edit your reports, as shown in the following screenshot. The Report Editor allows you to enter or change the title and description of your report and insert content including subjects or events, columns, and group bys. Once you're ready to start creating reports, see Create a Report.
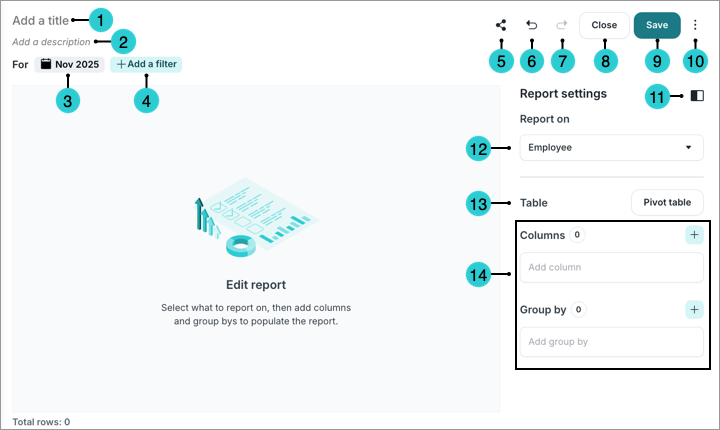
- Title box: Add a title for the report. This title appears in search results and is used in report links.
- Description box: Add a description for the report.
- Time picker: Set the time window and time context
- Add a filter: Add a filter to the entire report.
- Share: Share the report with other users. You can select the users or user groups to give Viewer access to the report, or generate a link that you can share with other users.
Note: Users must also have the Share Analysis capability to share reports with other users.
- Undo button: Undo your last action.
- Redo button: Redo your last action.
- Close: Close the Report Editor. Changes aren’t saved by default to support data exploration. To keep your edits, be sure to save before closing.
- Save: Save all changes made to the report.
- More options:
- Reset all changes: Revert the report to its last saved state.
- Duplicate report: Make a copy of the report.
- Download as: Export the report as an Excel or CSV file.
Note: Users must also have the Export to Excel capability to downlod a report.
- Delete report: Delete the report.
- Side panel button: Hide or show the side panel.
- Report on: Add a subject or event to report on.
- Table type: Choose the structural layout of your data.
- Table: Organize data into columns and group by rows for detailed lists.
Pivot table: Intersect row and column categories to calculate aggregated values like sums or averages.
Note: Table is the default table type. Switching the table type removes all configurations, such as columns, rows, and group by's. It is recommended to decide on your report structure before adding specific attributes.
- Table content options: Add rows, columns, and group by's to populate and structure the report.
Visier’s Analytic Model and the Report Editor
Reports are built in the Report Editor using principles from Visier’s Analytic Model. For more information, see Understand Visier's Analytic Model.
Following the same principle as Visier's Analytic Model, two types of reports can be created: event-based and subject-based.
- Subject-based reports: Provide a consolidated view of data at the end of the selected time period. For example, one row will represent one employee.
Note: Subject-based reports can pull attributes from related subjects connected by a forward reference. For example, a report based on the Employee subject will have access to the Applicant subject's profile attributes.
- Event-based reports: List all the transactions that happened within the selected time period. For example, there may be multiple rows of the same employee if they have multiple recorded transactions.
Note: Event-based reports can pull attributes from related subjects. For example, a report based on the Employee Starts event will have access to the Employee subject's profile attributes.
Attributes in the Report Editor
The attributes available in the Report Editor, and where they can be applied, change depending on if you are using a table or a pivot table.
- Table
- Pivot table
When using a table, the available attributes can be applied in the following areas:
Columns:
- Simple property
- Calculated property
- Calculation concept property
- Leveled dimension
- Selection concept
- Subject reference
Group by's:
- Leveled dimension
- Parent-child dimension
- Range dimension
- Subject reference dimension
Filters:
- Selection concept
- Dimension member
When using a pivot table, the available attributes can be applied in the following areas:
Rows, group by's, and pivot columns:
- Leveled dimension
- Parent-child dimension
- Range dimension
- Subject reference dimension
Values:
- Simple property
Filters:
- Selection concept
- Dimension member
Manage design object visibility
Streamline the report creation process by controlling the visibility of design objects, such as analytic objects, dimensions, properties, and concepts, that are available in the Report Editor.
You can edit object visibility individually or in bulk.
Edit objects individually
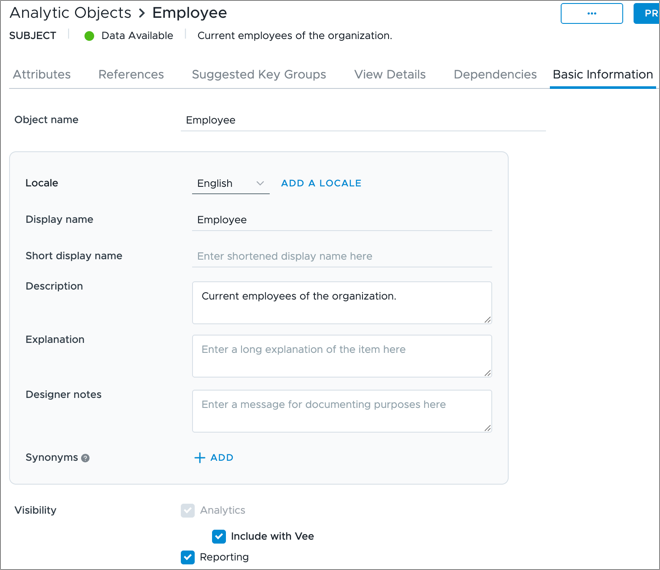
- In a project, click the object that you want to edit.
- Click the Basic Information tab.
-
In the Visibility field, choose where the objects are visible.
Edit objects in bulk
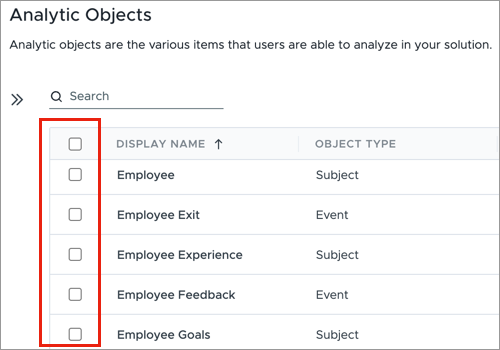
-
In a project, select the objects that you want to edit.
-
Click Edit Visibility.
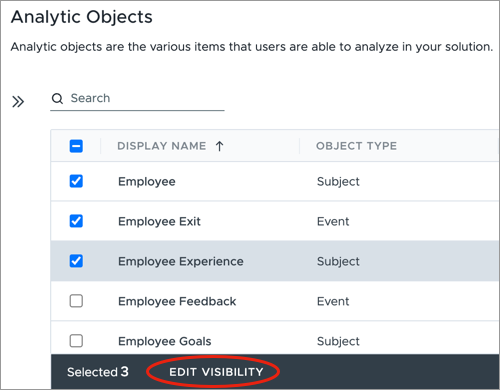
-
Choose where the objects are visible.
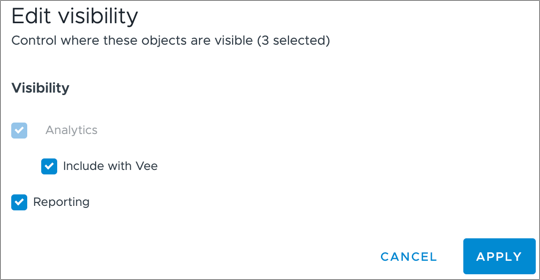
- Click Apply.
Note: Changes will not appear in the Report Editor until the project is published.
Considerations
- New objects are visible in Reporting by default.
- Removing visibility from an analytic object does not automatically remove it for related dimensions, properties, concepts, or references. These must be managed individually. For example, if you remove reporting visibility for the Job analytic object, you must still remove the visibility for the Job Name dimension.
- Existing reports will continue to display objects if their visibility is removed. However, if the object is removed as a group by or column, it will no longer be available as a selection within the Report Editor.