Create, Edit, and Insert an Explanation
Learn how to add or modify an explanation snippet that can be inserted in the explanations of other objects.
Overview
In Studio, you can create and modify explanation objects. Explanation objects are reusable snippets containing text that can be inserted into the explanation field of other objects, such as Metrics, to save time and effort.
Create an explanation
You can create an explanation in a project.
- In a project, on the navigation bar, click Model > Explanations.
- Click the Create button
 .
. - In the Add explanation dialog, fill in the Display name field.
Note: The maximum length is 50 characters.
- Click Create.
- Click the Explanation field to open the Explanation editor.
- In the Explanation editor, add your explanation content.
- Close the Explanation editor to save your changes.
-
When finished, publish your project to production. For instructions, see Publish Project Changes.
Edit an explanation
You can modify the text in an existing explanation in a project.
- In a project, on the navigation bar, click Model > Explanations.
- In the search bar, type the display name of the explanation you want to select.
- Click the Explanation field to open the Explanation editor.
- In the Explanation editor, make changes to the explanation content.
- Close the Explanation editor to save your changes.
-
When finished, publish your project to production. For instructions, see Publish Project Changes.
Note: Images in explanations
- Supported formats: JPEG, GIF, PNG, SVG.
- Only users with the Translation additional capability can add SVG images to explanations.
Edit the landing page for users with no permissions
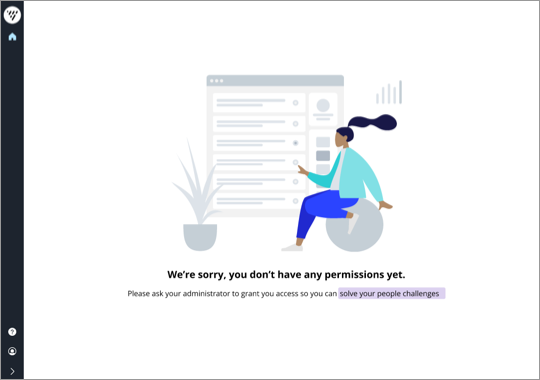
Users who have not been granted permissions to access any content will see a customizable landing page when they log in. The landing page allows for helpful information that can direct users to the appropriate person or process to request access.
The following screenshot is an example of what the default landing page looks like:

You can customize the text on the landing page by modifying its explanation object. The image cannot be customized.
- In a project, on the navigation bar, click Model > Explanations.
- In the search bar, search for the name Empty_Home_Explanation and select it.
Note: If you do not see this explanation object, contact your Customer/Partner Success Manager.
- Click the Explanation field to open the Explanation editor.
- In the Explanation editor, make changes to the explanation content.
- Close the Explanation editor to save your changes.
-
When finished, publish your project to production. For instructions, see Publish Project Changes.
Insert an explanation
You can insert explanation objects into the explanation field of other objects, such as Metrics, in a project.
-
In a project, on the navigation bar, click Model.
-
In Model, select the appropriate object type; for example, Analyses, Concepts, or Metrics.
-
In the list, select the object you want to change; for example, in Analytic Objects, select Employee.
-
Click Basic Information.
- Click the Explanation field to open the Explanation editor.
- In the Explanation editor, click Embed Explanations in the ribbon.
- In the list, select the display name of the explanation object you want to insert.
- Close the Explanation editor to save your changes.
-
To preview your changes, on the navigation bar, click Preview Solution.
- Find the object in the solution experience and hover over the Help button
 and then click More info. The explanation is visible in the dialog box.
 -
When finished, publish your project to production. For instructions, see Publish Project Changes.
