
Export Custom Content
Select a tenant's custom content, such as analyses, metrics, and concepts, to export for reuse in a different tenant.
As an application developer, you might create custom content within one of your tenants and then want to use that content in a different tenant. You can export custom content from a tenant and import it as a project into a different tenant to reuse any custom content you've created. By exporting custom content to reuse in another tenant, you no longer have to recreate the same content in multiple tenants.
Custom content is defined as:
- Changes: Any design object that was created or changed within a project.
- Tenant: Any design object that only exists in the tenant and don't exist in the original Visier Blueprint.
- Tenant override: Any design object from Visier's Blueprint that has been changed in the tenant, such as modifying a Visier analysis.
You can choose to export any custom-built content or customized content, such as analyses, metrics, and dimensions. In the exported ZIP file, a CSV file lists the exported objects. You can share the ZIP file with other application developers to import as a new project for reuse in other tenants.
Note: All custom objects in the custom content's dependency tree are automatically added to the export.
Export multiple custom content objects
To export more than one custom object, do the following:- Open a project.
- Navigate to any custom object, such as a custom analysis or permission.
- Hover over a custom object and click the Add to Custom Content Export button
 , as shown next.
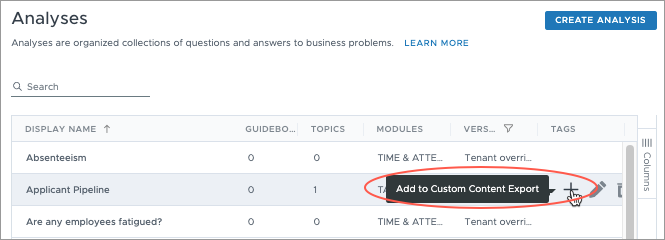
- Repeat steps 2 and 3 as needed.
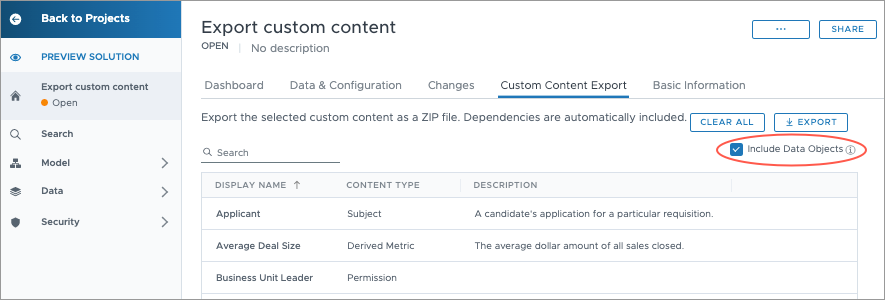
- To export the selected objects, on the navigation bar, click Home
 > Custom Content Export.
 - Optional: To automatically include a custom object's data objects, such as mappings and business rules, select Include Data Objects, as shown next.
- Click Export.
- Type a file name for the ZIP file.
- To replace the tenant name with a system-provided name, select Anonymize Tenant Name.
Click Export.
Result: A ZIP file is downloaded to your computer.
You can then import the ZIP file into a different tenant to reuse the custom objects. For more information, see Import or Export a Project Changelist.
Export a custom content object directly
To export an individual custom object, do the following:
- Open a project.
- Navigate to the object you want to export.
For example, navigate to Security > Permissions, and then select a custom permission.
- Click the More actions button > Export.
- Type a file name for the ZIP file.
- Optional: To automatically include a custom object's data objects, such as mappings and business rules, select Include Data Objects.
- Optional: To replace the tenant name with a system-provided name, select Anonymize Tenant Name.
- Click Export.
Result: A ZIP file is downloaded to your computer.
You can then import the ZIP file into a different tenant to reuse the custom objects. For more information, see Import or Export a Project Changelist.