
File Upload Using the Solution
Use the solution to upload your data files directly to Visier.
If you prefer to download data from your database, prepare it, and then upload it into Visier, the file upload method is recommended. Uploading data files using the solution is particularly useful for initial data onboarding, testing, and conducting ad hoc data uploads.
Upload files using the solution workflow
-
Prepare your data files for upload by ensuring they are in the expected format and follow the recommended file structure and naming conventions. For more information on how to structure your data files for upload, see Data File Guidelines and Visier Data Dictionaries.
-
After your data files are prepared, upload them in Studio.
Upload data files in Studio
- Optional: If you want an additional layer of protection, you can encrypt your data files. For more information, see Encrypt files.
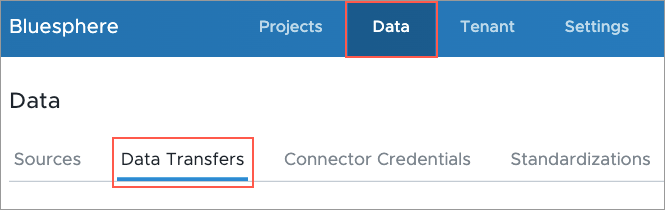
- On the global navigation bar, click Data > Data Transfers.
-
Compress the data files you want to upload in a ZIP file. You can also upload CSV, XLS, XLSX, and PGP-encrypted files.
- Click Upload File and select the file on your computer.
- Click Upload.
Note:
- If you upload an XLS or XLSX file containing multiple sheets, each sheet will create a unique data transfer.
- The maximum file upload size is 5GB.
- The maximum number of columns per file is 512.
Result: The files are uploaded to a secured file server.
Encrypt files
Access requirements
Custom profiles with one of the following capability sets:
- Data (Write, Simple)
- Data Upload
Reach out to your administrator for access.
If you want an additional layer of protection against data disclosure, you can use Pretty Good Privacy (PGP) to encrypt your files.
Note: The legacy PGP key, previously provided in our documentation, will be deprecated. Please generate a new PGP key for your tenant and use it to encrypt your files. For instructions, see Download the public key.
Download the public key
To encrypt your files, you will need access to the public encryption key for your tenant.
- In Studio, click Settings on the global navigation bar.
- In Settings, click Manage PGP Keys.
- If there is no key, click Generate PGP Key Pair to create a key pair: public key and private key.
- Retrieve the public key to encrypt your files by downloading the ASC file. Hover over the Actions column and click the Download PGP public key ASC file button
 .
. - Encrypt files using GPG. For more information, see Encrypt files using GPG.
Note:
- PGP keys have an expiration of 2 to 10 years. Default is 2 years. We do not accept or process files that are encrypted with an expired key. Remember to generate and rotate your keys before they expire.
- Each tenant can have a maximum of two valid keys at one time.
- To use Visier APIs to generate a PGP key pair and download the public key, see PGP Keys API.
Encrypt files using GPG
Download and install a command-line tool such as GnuPG to encrypt files on your MacOS or Windows computer.
After you install the tool, use the following sample commands to import your public key and encrypt files.
When using the following sample commands, replace:
- {public_key} with the filename of the generated public key; for example, 1t9ay89lor.public.pgp.asc
- {file_to_encrypt} with the filename of the file you want to encrypt; for example, employee_profile.csv
- {encrypted_file} with the filename you want for the encrypted file; for example, encrypted_employee_profile.csv.gpg
- {key_ID} with the unique identifier for the public key; for example, 1t9ay89lor
You can find the Key ID in the Manage PGP keys room by hovering over the Actions column and clicking the Copy key ID button . The Key ID can also be found as part of the public key filename.
- Open Terminal in MacOS or Command Prompt in Windows.
- To import the public key file, run the command gpg --import {public_key}
For example: gpg --import 1t9ay89lor.public.pgp.asc - To encrypt a specific file, run the command gpg --output {encrypted_file} --encrypt --recipient {key_ID} {file_to_encrypt}
For example: gpg --output encrypted_employee_profile.csv.gpg --encrypt --recipient 1t9ay89lor employee_profile.csvResult: The encrypted output file is created and stored in your working directory.