
The Analysis Context
Change the analysis context to select the population and time period for analysis.
Access requirements
Permission with these capabilities: Change Analysis Context
Reach out to your administrator for access.
Overview
The analysis context acts as a filter throughout the solution that allows you to:
- Narrow down the data to a specific population. For example, you can add filters to view data only for the HR team. For more information, see Filters.
- Select the time granularity and time period for analysis. You can change the granularity to adjust the frequency at which results are calculated and shown (for example, switch from a yearly to monthly view). Then, change the time period to view data for a specific point in time (for example, December 1989) or a time range (for example, July 2016 to June 2017). For more information, see The Time Context.
You can change the analysis context using the options available in the Analysis Context toolbar.

- Time picker: Displays the time context. Click to change the granularity, time period, time window, and time setting for your charts. For more information, see The Time Context.
- My permissions: Click to see your security context, the permissions applied to your account, and the data access you've been granted. This will help you understand why you might be seeing certain populations and a subset of the data. The information in the Permissions dialog will change depending on the subject (for example, Employee and Requisition) that you're analyzing.
- Analysis context token: Displays the filters, drill path, key groups, assumptions, and scenarios that have been applied.
- Filter picker: Click to change the analysis population by adding filters and key groups. For more information, see Filters and Groups and Key Groups.
- Add an assumption: Click to adjust your projections by applying assumptions or scenarios. This is only available if your chart or analysis contains a projection metric. For more information, see What-if Models.
- Shortcuts: Click to select a filter shortcut from a list of your permissions and key groups. You can set a shortcut as your default context for charts and analyses. For more information, see Filters.
- More actions: Find options to save key groups and scenarios and open the Key Groups Manager and Scenarios Manager.
You can change the analysis context at the individual chart level or the analysis level.
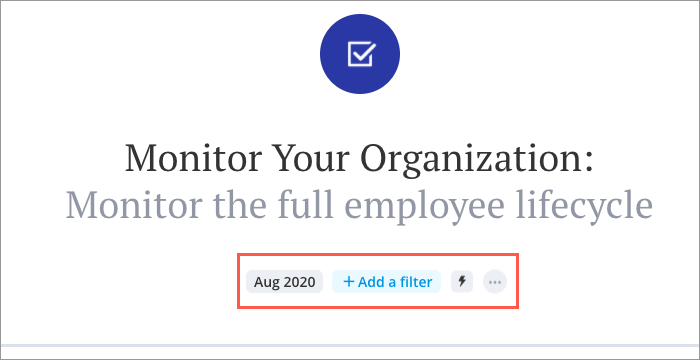
When working with a chart, you can find the Analysis Context toolbar located below the visual title, as shown in the following screenshot.

When working with an analysis, you can find the Analysis Context toolbar located below the analysis title, as shown in the following screenshot.
For more information, see The Analysis Context at the Analysis Level.
The picker views
The Metric, Filter, and Group By pickers have two different views.
When selecting these pickers, you'll be initially presented with a menu that contains a search box and list of suggested metrics or attributes, as shown in the following screenshot.
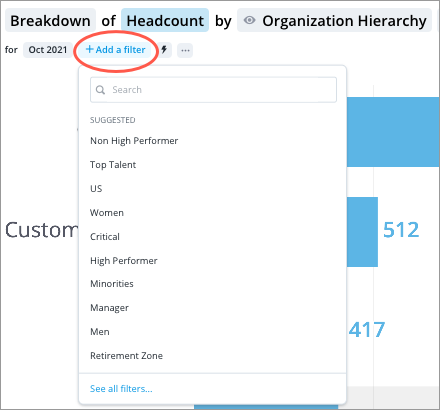
The suggestions are based on the metric or attribute that is currently selected.
You can see a list of recently used items by selecting the search box, as shown in the following screenshot. Only previously selected user created key groups and group by attributes will appear in the list of recently used filters.
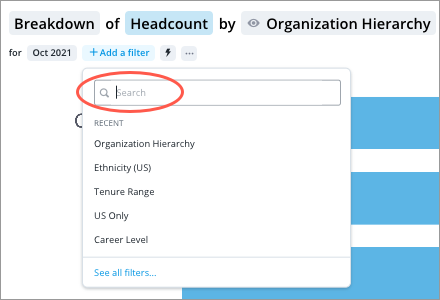
If you want to see the entire list of metrics or attributes that are available to you, click See all at the bottom of the picker.
This will open the pickers in full screen, as shown in the following screenshot.
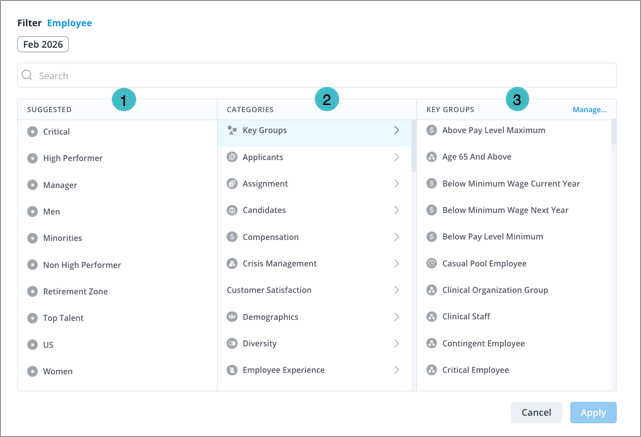
In this view, you can use the following panes to browse and select attributes:
- Suggested pane: A list of the most relevant attributes for the selected item. This pane will not appear if there are no suggestions.
- Categories pane: A list of the attribute categories. Select a category to see the included attributes in the Selection pane which is located on the right side of the picker.
- Selection pane: A list of the attributes in a category and where you choose an attribute. After you select an attribute, you'll be prompted to select the attributes you want to include or exclude.
In this section