
Create a Custom Dimension
Learn how to create and configure a custom dimension.
Access requirements
Profiles: Basic Model Developer
Custom profile with these capabilities: Model (Write, Simple)
Reach out to your administrator for access.
Overview
Custom dimensions are based on other dimensions to make unique data groups for non-numeric data. To modify the structure of a custom dimension, such as its groups and the dimension it uses, you can customize the custom dimension. Customization is done before configuration because it defines the custom dimension's schema. After you define the custom dimension's associated dimension and ranges, you can then configure the members in each custom group.
Create a custom dimension
Note: For a tutorial that walks you through creating a new dimension, see Create New Employee Attributes and Metrics.
You can create a dimension in the Dimensions room or by selecting a specific analytic object on which to create the dimension.
Model > Dimensions steps
In this workflow, start by selecting the dimension type to create and then select its associated analytic object.
- In a project, on the navigation bar, click Model > Dimensions.
- Click Create Dimension.
- Selected Custom, and then click Next.
- Select an analytic object and then click Next.
This is the object associated with the dimension; for example, if you're creating a dimension for your employees' hair color, the analytic object is Employee.
- Type a display name and description.
- When finished, click Create.
Result: The dimension is created and can now be customized and configured.
Model > Analytic Object steps
In this workflow, start by selecting the analytic object and then select the dimension type to create.
- In a project, on the navigation bar, click Model > Analytic Objects.
- Select an analytic object.
- In the Attributes tab, click Create Attribute > Dimension.
- Select Custom, and then click Next.
- Type a display name and description.
- When finished, click Create.
Result: The dimension is created and can now be customized and configured.
Customize a custom dimension
Pick a dimension and create groups related to it.
Example: Let's say your organization wants to simplify your performance ratings into 3 subgroups: High Performer, Solid Performer, and Needs Development. In your Custom Performance Grouping dimension, in the Customize tab, you can select the Performance Rating dimension and then create the three groups. After you're done, you can configure the dimension to select performance rating members for each of the groups.
To customize a custom dimension:
-
In a project, on the navigation bar, click Model > Dimensions.
- Select a custom dimension.
-
Navigate to Customize.
- Click Select Dimension and choose one dimension from the list.
Note: The custom dimension will inherit any analytic objects that are supported by the selected dimension. If the selected dimension is also a custom dimension, only its configured analytic object will be inherited.
- Click Select.
- To add groups, click Create Group.
-
Type a display name and description.
- Optional: Click Create Another to make multiple groups.
- When finished, click Done.
- Optional: Use Reorder to change the order of the dimension's groups.
Tip:
- To change the custom dimension's selected dimension, click Edit and then select a different dimension.
- To change a group's display name and description, click a group to open the Info panel. In the Info panel, type a new display name or description.
Configure a custom dimension
Select dimension members for each group in the dimension to define a custom dimension.
Member selection maps individual member values from a dimension, such as performance levels. The members of the dimension are available for configuration in each group.
Example: Let's say your organization wants to simplify your performance ratings into 3 subgroups: High Performer, Solid Performer, and Needs Development. In your Custom Performance Grouping dimension, in the Configure tab, you can select the performance rating members that should belong to the custom groups High Performer, Solid Performer, and Needs Development, such as selecting Level 6 for High Performer, Levels 4 and 5 for Solid Performer, and Levels 1, 2, and 3 for Needs Development.
To configure a custom dimension:
-
In a project, on the navigation bar, click Model > Dimensions.
- Select a custom dimension and navigate to the Configure tab.
- Recommended: To make sure you don't map the same member to multiple groups, turn on Highlight duplicates. This highlights any members that are in more than one group so that you can identify and remove duplicates where necessary.
- Expand the group you want to configure.
- Do any of the following:
- To add members to the group, select the appropriate members.
- To change the group's display name or description, click Edit Basic Information.
- Map members to each group until finished.
Note: All dimension members must be included in a group.
Troubleshoot "Data is not available"
You may see a "Data is not available" note in the Customize tab. To investigate data availability, check:
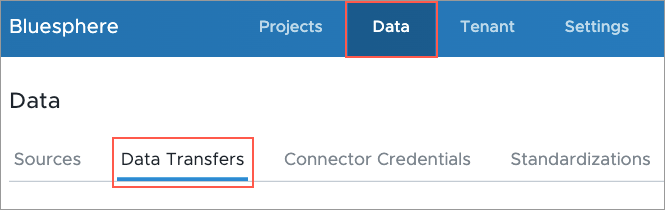
- The Data Transfers room in the global workspace. There must be a data file that contains data for the object.
- The Sources room in the global workspace. The data file containing your object data must be connected to a source. For more information, see Sources.
- The Mappings room in a project. The source that contains your object data must be mapped to the associated property. For more information, see Mappings.
- The data version. After mapping your source data to a property in Visier, you must generate a new data version. For more information, see Data Categories and Run a Job.
Validate a dimension
Access requirements
Profiles: Basic Model Developer
Custom profile with these capabilities: Model (Read, Simple)
Data required: Access to data you're validating
Reach out to your administrator for access.
Previewing your dimension allows you to quickly look at your dimension as a visual to determine whether its components are configured correctly. To preview your new dimension, its associated analytic object must have a default metric. For more information, see Default metric.
-
In a project, on the navigation bar, click Model > Dimensions.
- Select a dimension.
- In the upper-right corner, click Preview.
Publish your changes
When finished configuring and customizing the dimension, publish the project to production. For more information, see Publish Project Changes.
To see your changes, run a data version in production or wait until your next scheduled data load to make the data available to users. For more information, see Data Versions.