
Set Up Visier Extensions
Learn how to set up Visier Extensions.
Access requirements
Profiles: Basic Model Developer and Data Engineer
Custom profile with these capabilities: Data (Write, Detailed), Model (Write, Simple), and Manage Jobs
Permission with these capabilities: Ad Hoc Analysis, Create Analysis Context, Change Analysis Context, Guidebook, and View Details
Reach out to your administrator for access.
Overview
To set up Visier Extensions, use one of the following methods:
- Connector-based setup: If the extension data is loaded through a designated data connector such as Salesforce and ServiceNow®, you will use connector-based setup. This setup experience uses the Extension Setup Wizard and the Studio Assistant to set up your data connector and assist with setting up the extension.
- Source-based setup: For all other extensions, you will use source-based setup. This setup experience uses the Extension Setup Wizard and the Studio Assistant to map your source data and assist with setting up the extension.
Connector-based setup
This setup experience uses the Extension Setup Wizard and the Studio Assistant to set up your data connector and assist with setting up the extension.
Prerequisites
When you set up the data connector in the Extension Setup Wizard, you need to provide your connector credentials to Visier so that we can retrieve data from your source system. Contact your IT department to get your connector credentials. For an example of what connector credentials you need to provide for each extension, see "Supported connectors and requirements" in Data In Connectors.
Launch the Extension Setup Wizard
-
In a project, on the navigation bar, click Extensions.
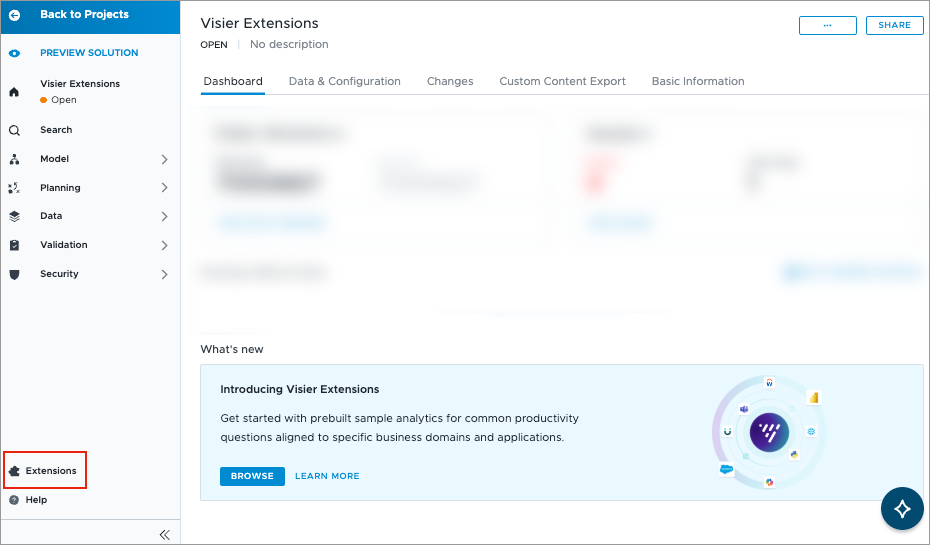
Tip: Visier Extensions are also easily accessible in a project by clicking Browse under Introducing Visier Extensions.
-
In the Visier Extensions dialog, find the Visier Extension you want to add, then click Add.
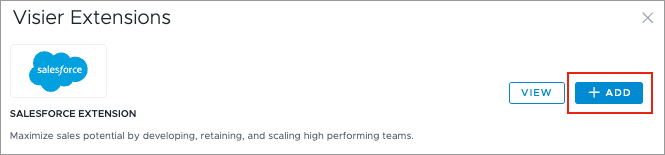
Note: When you add an extension, it will become available across all your projects in the last step of the wizard during data setup. To remove the extension, contact Visier Technical Support.
Result: The Extension Setup Wizard opens.
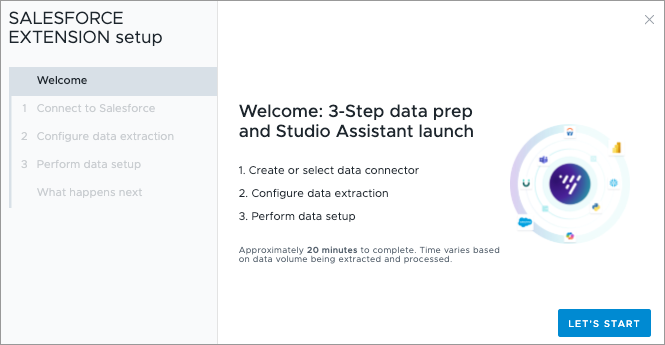
- Click Let’s Start.
- In the setup wizard, do the following:
- Create or select data connector: Give your connector a name and description and enter your connector credential details.
- Configure data extraction: Select the data history to extract and load. For example, past 6 months.
- Perform data setup: All the necessary data loading and data processing objects, such as data categories, sources, and mappings will be automatically created. Then, an extraction job is created to retrieve data through the connector.
Result: A data load job starts. If successful, the data load job generates a new data version.
- Click View next steps.
From this point, the Studio Assistant will guide you through the remaining steps to complete the extension setup with the relevant documentation. For more information, see "Studio Assistant" in Navigate Studio.
Tip: You can revisit the setup guide in the Studio Assistant at any point by navigating to Extensions > Setup Guide.
- Monitor the progress of your job:
- On the navigation bar, click Data > Jobs.
- In the Jobs room, click the Refresh button to track the status of your data extraction and get the most up-to-date load information. If successful, the data load job generates a new data version. Take note of the data version number.
- On the navigation bar, click Data > Data Categories.
- Confirm that the same data version shows under the respective Visier Extension data category. If the data version is different, see Set the Data Version.
- Configure concepts:
- On the navigation bar, click Model > Concepts.
- Select a concept that needs to be configured. The Studio Assistant will list the concepts that require configuration for you.
- In the Configure tab, click a dimension member to configure.
- In the list of data members, do one of the following:
- Click Automap to quickly map values to concepts. With automap, Visier can detect unconfigured dimension members and intelligently suggest configurations. For more information, see Automated concept configuration.
- Select the values that are relevant to the selection concept. For example, for a Customer Support Agent selection concept, you may select job names such as Customer Support Representative and Customer Support Coordinator.
- On the navigation bar, click Preview Solution.
- Optional: If you run into any data issues, validate the mappings generated by the connector by navigating to Data > Mappings in Studio. To see the required, recommended, and optional fields for data loading per extension, see "Visier People Extend Data Dictionaries" in Visier Data Dictionaries.
Note:
- If you update the mappings, you will need to run another job for the data category. For more information, see "Run a job in a project" in Run a Job.
- To help you validate, search for an analysis with the keyword Validation when previewing the solution, such as Support Case - Validation. This analysis will help you validate and verify that the values you see are aligned with the data you loaded.
- Once ready, commit your changes and publish the project so that the changes are available in production. For more information, see Manage and Commit Project Changes and Publish Project Changes.
- Optional: If your data load routine is well-defined, you can schedule new jobs to extract your data and generate corresponding data versions at your desired frequency. For more information, see Schedule a Job.
Source-based setup
This setup experience uses the Extension Setup Wizard and the Studio Assistant to map your source data and assist with setting up the extension.
Prerequisites
- Ensure your source data is ready to be loaded into Visier. Prepare your data files for upload by ensuring they are in the expected format and follow the recommended file structure and naming conventions. For more information on how to structure your data files for upload, see Data File Guidelines and Visier Data Dictionaries.
- To use the Extension Setup Wizard and AI automapping, your organization must also opt in to AI features. In the global workspace, click Settings > AI Features.
Launch the Extension Setup Wizard
-
In a project, on the navigation bar, click Extensions.
Tip: Visier Extensions are also easily accessible in a project by clicking Browse under Introducing Visier Extensions.
-
In the Visier Extensions dialog, find the Visier Extension you want to add, then click Add.
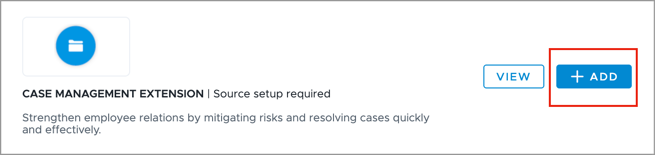
Note: When you add an extension, it will be available across all your projects. To remove the extension, contact Visier Technical Support.
Result: The Visier Extension module is added, and the Extension Setup Wizard opens.
-
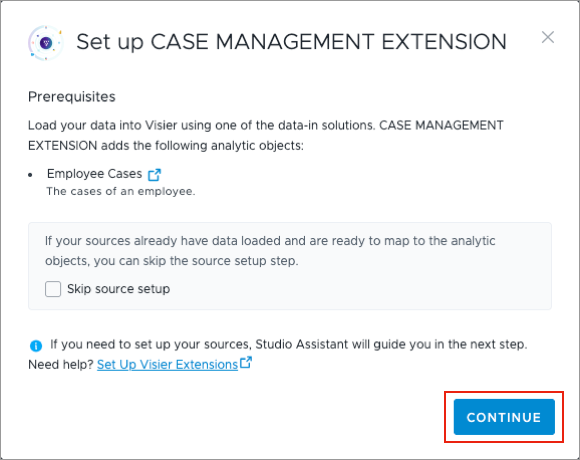
Click Continue to load your source data.
Tip: If you have already loaded your source data, click the Skip source setup box. Skip to step 7.
Result: The Studio Assistant will open to guide you through loading your data into Visier.
-
In the Studio Assistant, click Actions > Upload files. For more information about loading data into Visier, see Create a Source and Bring Data In.
Result: The Data Transfers room will open in the global workspace.
-
In the Data Transfers room, click Upload File and select the file on your computer.
-
Return to your project and do the following:
- Click Extensions in the navigation bar.
- Navigate to the extension you are adding and click Update Setup.
-
Ensure the Skip source setup box is checked to continue to the 3-Step data prep and Studio Assistant launch.
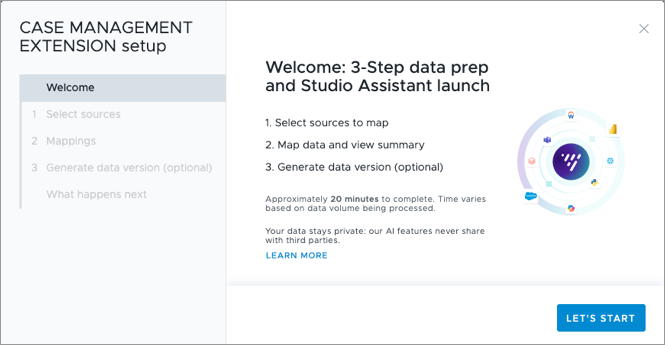
-
Click Let's Start.
-
In the Extension Setup Wizard, do the following:
- Select the sources that will be automapped to the extension's analytic objects. Click Next.
- Review the Source and Target tabs to validate that they have been mapped correctly. Click Next.
-
If the mappings are correct, click Yes, generate data version, then click Next.
Result: You will be prompted to continue to the Studio Assistant to complete the next steps.
-
Click Continue with Studio Assistant. From this point, the Studio Assistant will guide you through the remaining steps to complete the extension setup with the relevant documentation. For more information, see "Studio Assistant" in Navigate Studio.
-
Check the mappings that have been automapped by clicking Actions > Create mappings. For more information, see Mappings and Rules. Once you are finished, click Next.
Note: Adding mappings for the Profit & Loss Extension requires that you understand how to map the following fields on the Finance Data subject:
EventDate: The event date can be arbitrary. Since the Finance Data subject represents finance-related data for the organization, you can set the event date of the subject to the start date of the organization. For theEventDatefield, use the extraction rule functiontenantStartDate.Finance_DataID: Likewise, the ID of the Finance Data subject is also arbitrary. Set the ID of the subject to any string value, such as “Finance Data”.- The
Finance_DataIDon the Finance Record event needs to match the ID set here, to denote that the financial records are recording events related to this financial entity.
- The
-
Monitor the progress of your Data Version generation in the Jobs room. Click Actions > Monitor job progress. Once you are finished, click Next.
-
Validate the new extension to ensure there are no data issues. Click Actions > Preview.
- If you run into any data issues, validate the mappings by navigating to Data > Mappings in Studio. To see the required, recommended, and optional fields for data loading per extension, see "Visier People Extend Data Dictionaries" in Visier Data Dictionaries.
Note:
- If you update the mappings, you will need to run another job for the data category.
- To help you validate, search for an analysis with the keyword Validation when previewing the solution, such as Support Case - Validation. This analysis will help you validate and verify that the values you see are aligned with the data you loaded.
- Once you are finished, click Next.
- If you run into any data issues, validate the mappings by navigating to Data > Mappings in Studio. To see the required, recommended, and optional fields for data loading per extension, see "Visier People Extend Data Dictionaries" in Visier Data Dictionaries.
- Once ready, commit your changes and publish the project so that the changes are available in production. Click Actions > Commit and publish. For more information, see Manage and Commit Project Changes and Publish Project Changes.
- Optional: If your data load routine is well-defined, you can schedule new jobs to extract your data and generate corresponding data versions at your desired frequency. Click Actions > Schedule a Job. For more information, see Schedule a Job.
Automated concept configuration
Prerequisites: Your organization must opt in to AI features. In the global workspace, click Settings > AI Features.
Use Automap to configure concepts based on AI recommendations. With automap, Visier can detect unconfigured values and intelligently suggest configurations. The AI model used in this feature was trained on datasets that may contain historical, societal, and statistical biases and can inadvertently perpetuate these patterns in the output. Please review the outputs carefully. For more details on Visier's AI Bias prevention, see Bias Prevention and Responsible AI.
To configure a concept with automap:
- In a project, on the navigation bar, click Model > Concepts.
- Select a calculation, process, or member selection concept from the list.
- In the Configure tab, click Automap.
Result: Visier determines whether any of the unconfigured values belong to an existing concept member. If so, Visier includes the values appropriately. To see the summary, click View Summary.
- Optional: Review the mapped values and unmap any values if necessary.
Automap can only be used to include values, for selection concepts you must exclude values manually. Automap remembers your mapping preferences. If you've previously mapped or unmapped members manually, automap will respect those choices and won't automatically remap them.
To reset the configuration and apply automap, click the More options button ![]() > Reset configurations.
> Reset configurations.
Note:
- Automap is available for selection concepts with under 200 members and process/calculation concepts with under 50 members.
- Selection concepts with more than one dimension are not supported.
- For calculation concepts, automap will map all of the concept's perspectives.
Data security and permissions
Users without full data access will not automatically receive permissions to access new analytic objects and data sources added by a Visier Extension. Without the required permissions to the analytic objects, you will not be able to preview the extension's guidebook or any associated analyses that rely on these new objects. If your permissions include sources, you will also be unable to edit or preview data mappings or rules related to the new extension.
To gain access and proceed with the extension setup, you will need to request permissions from an administrator who manages data security within your organization. To do this, you will need to share the project with the administrator and grant them the Edit or Share permission level. For more information, see Share a Project.
The administrator will then need to assign you the necessary permissions for all new subjects and sources within the extension module in the project and commit their changes.
- To see the subjects that were added by the extension, navigate to Model > Analytic Objects in Studio and filter the Modules column to the name of the extension.
- To see the sources that were added by the extension in the setup wizard, refer to the following table. If you are using source-based setup, you will also need access to the appropriate sources.
|
Name |
Sources |
|---|---|
|
ServiceNow® Extension |
asmt_metric_result sn_customerservice_case_sys_audit asmt_assessment_instance sn_customerservice_case sys_user |
|
Salesforce Extension |
User Account AccountHistory Contact ContactHistory Opportunity OpportunityFieldHistory OpportunityHistory Task ForecastingFact Period |
|
Jira Extension |
Jira User With Date Jira Issue Jira Issue Change Log |
|
Calendar Extension |
NewAndUpdates NewAndUpdateEventAttendees HistoricalEvents HistoricalEventAttendees FutureEvents FutureEventAttendees |
Once the administrator has committed the permission changes, ensure that your project is updated to the latest revision. This will ensure that the permission changes take effect for you. For more information, see Data Security for a Permission and Manage and Commit Project Changes.
After confirming you are on the latest revision and the permissions have been granted, you can resume the setup guide in the project.