
File Upload Using the Solution
Use the solution to upload your data files directly to Visier.
If you prefer to download data from your database, prepare it, and then upload it into Visier, the file upload method is recommended. Uploading data files using the solution is particularly useful for initial data onboarding, testing, and conducting ad hoc data uploads.
Upload files using the solution workflow
-
Prepare your data files for upload by ensuring they are in the expected format and follow the recommended file structure and naming conventions. For more information on how to structure your data files for upload, see Data File Guidelines and Visier Data Dictionaries.
-
After your data files are prepared, upload them in Studio
-
Generate sources for each data file. Sources store data for your solution, for example, Employee data is stored in the Employee source. For more information, see Create a source through file upload.
Note:
- If you have previously uploaded the same type of data, for example, Employee data, your data transfer automatically connects to the existing Employee source if the file matches the existing Employee source regex. For more information, see Add or Remove Records from a Source.
-
A source's file type is locked once generated. If you change your data delivery format, for example move from Excel to CSV, you must convert the source's file type. Please contact Visier Technical Support for assistance.
-
Create a project in Studio to hold your work. Projects are how Visier handles version control, allowing you to define and edit the solution separately from the current production version of the solution. For more information, see Use Projects for Version Control.
-
Create a data category for the data you are uploading. A data category represents a dataset loaded into Visier that runs on a unique data load frequency. For more information, see Data Categories.
-
Create and configure mappings to specify how the data in your source is loaded into Visier. Mappings connect the source files' columns to the properties in Visier's analytic objects. For more information, see Add a Mapping.
Note: If you have previously uploaded the same type of data, for example, Employee data, without any additional columns, you do not need to create a new mapping.
-
Run a job to generate a data version. Jobs define the tasks needed to load your data into Visier, for more information, see Run a Job. A data version is a instance of uploaded data with a unique release number. For more information, see Data Versions.
-
Preview the data in the solution to confirm that the data is being shown correctly. For more information, see Preview a Project.
Upload data files in Studio
- Optional: If you want an additional layer of protection, you can encrypt your data files. For more information, see Encrypt files.
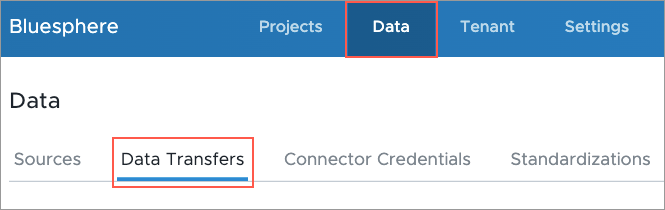
- On the global navigation bar, click Data > Data Transfers.
-
Compress the data files you want to upload in a ZIP file. You can also upload CSV, XLS, XLSX, and PGP-encrypted files.
- Click Upload File and select the file on your computer.
- Click Upload.
Note:
- If you upload an XLS or XLSX file containing multiple sheets, each sheet will create a unique data transfer.
- The maximum file upload size is 5GB.
- The maximum number of columns per file is 512.
Result: The files are uploaded to a secured file server.
Encrypt files
If you want an additional layer of protection against data disclosure, you can use Pretty Good Privacy (PGP) to encrypt your files.
Note: The legacy PGP key, previously provided in our documentation, will be deprecated. Please generate a new PGP key for your tenant and use it to encrypt your files. For instructions, see Download the public key.
Download the public key
To encrypt your files, you will need access to the public encryption key for your tenant.
- In Studio, click Settings on the global navigation bar.
- In Settings, click Manage PGP Keys.
- If there is no key, click Generate PGP Key Pair to create a key pair: public key and private key.
- Retrieve the public key to encrypt your files by downloading the ASC file. Hover over the Actions column and click the Download PGP public key ASC file button
 .
. - Encrypt files using GPG. For more information, see Encrypt files using GPG.
Note:
- PGP keys have an expiration of 2 to 10 years. Default is 2 years. We do not accept or process files that are encrypted with an expired key. Remember to generate and rotate your keys before they expire.
- Each tenant can have a maximum of two valid keys at one time.
- To use Visier APIs to generate a PGP key pair and download the public key, see PGP Keys API.
Encrypt files using GPG
Download and install a command-line tool such as GnuPG to encrypt files on your MacOS or Windows computer.
After you install the tool, use the following sample commands to import your public key and encrypt files.
When using the following sample commands, replace:
- {public_key} with the filename of the generated public key; for example, 1t9ay89lor.public.pgp.asc
- {file_to_encrypt} with the filename of the file you want to encrypt; for example, employee_profile.csv
- {encrypted_file} with the filename you want for the encrypted file; for example, encrypted_employee_profile.csv.gpg
- {key_ID} with the unique identifier for the public key; for example, 1t9ay89lor
You can find the Key ID in the Manage PGP keys room by hovering over the Actions column and clicking the Copy key ID button . The Key ID can also be found as part of the public key filename.
- Open Terminal in MacOS or Command Prompt in Windows.
- To import the public key file, run the command gpg --import {public_key}
For example: gpg --import 1t9ay89lor.public.pgp.asc - To encrypt a specific file, run the command gpg --output {encrypted_file} --encrypt --recipient {key_ID} {file_to_encrypt}
For example: gpg --output encrypted_employee_profile.csv.gpg --encrypt --recipient 1t9ay89lor employee_profile.csvResult: The encrypted output file is created and stored in your working directory.
Next steps
After you've uploaded your data files, do the following based on your use case:
-
If you are conducting an initial data load or uploading new data files, the next step is to generate sources for each data file that was uploaded. For more information, see Create a source through file upload.
-
If you are uploading data files that have been previously uploaded, for example, Employee data, and you have added columns, the next step is to configure the existing Employee mapping. For more information, see Add a Mapping.
-
If you are uploading data files that have been previously uploaded without any additional columns, you have the option to run a job to generate a data version in the project. You can then preview your changes in the solution. For more information, see Run a Job.
Alternatively, if your data loads are stable for this type of data, you may want to schedule your jobs to automate the data version generation process. For more information, see Schedule a Job.